
05Mar
Lesson Plan > Lesson 20 > Science
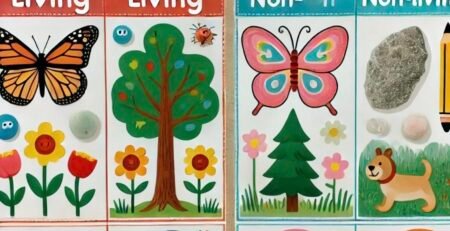
Elementary Level: Types of Animals
Mid Level: Food Webs
High Level: The Circulatory System
Elementary Level (Kinder to Grade 2)

Subject: Types of Animals
Alignment with Standards:
- Next Generation Science Standards (NGSS):
- 1-LS1-1: Use materials to design a solution to a human problem by mimicking how plants and/or animals use their external parts to help them survive, grow, and meet their needs (introduces animal traits).
- 1-LS3-1: Make observations to construct an evidence-based account that young animals are like, but not exactly like, their parents (links to animal groups).
- Common Core State Standards (CCSS):
- CCSS.ELA-LITERACY.W.1.8: With guidance and support from adults, recall information from experiences or gather information from provided sources to answer a question.
- CCSS.ELA-LITERACY.SL.1.5: Add drawings or other visual displays to descriptions when appropriate to clarify ideas, thoughts, and feelings.
Objectives
- Understand that animals can be grouped based on shared traits (e.g., mammals, birds, fish, reptiles, amphibians).
- Classify animals into these groups by identifying key features (e.g., fur, feathers, scales).
- Create a chart or collage to visually organize animal groups.
- Build observation and discussion skills about the natural world.
Materials
- Large poster paper or a notebook for the chart/collage
- Crayons, markers, or colored pencils
- Scissors and glue stick
- Pictures of animals (printed from online sources, cut from old magazines, or hand-drawn)
- Animal book (e.g., National Geographic Little Kids First Big Book of Animals or The Animal Book by Steve Jenkins)
- Optional: Toy animals or flashcards with animal pictures
Activities
Day 1: Introduction to Animal Groups (30-45 minutes)
- Warm-Up (5-10 minutes):
- Ask: “What’s your favorite animal? What makes it special?”
- Say: “Today, we’re going to sort animals into fun groups—like a big animal party!”
- Direct Instruction (15 minutes):
- Introduce five animal groups with simple traits:
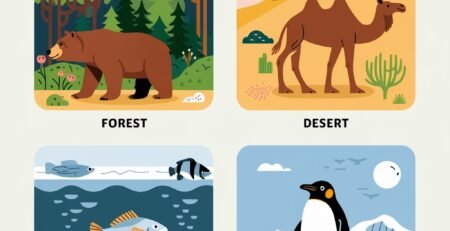
- Mammals: Have fur or hair, drink milk from moms (e.g., dog, cat, whale).
- Birds: Have feathers, lay eggs, most fly (e.g., eagle, penguin).
- Fish: Live in water, have scales, use gills (e.g., goldfish, shark).
- Reptiles: Have scales, lay eggs on land (e.g., snake, lizard).
- Amphibians: Live on land and water, slimy skin (e.g., frog, salamander).
- Show pictures or toys for each group and point out traits (e.g., “Look at this bird’s feathers!”).
- Introduce five animal groups with simple traits:
- Discussion (10 minutes):
- Read a page from an animal book. Ask: “Which group does this animal belong to? Why?”
- Wrap-Up (5 minutes):
- Say: “Tomorrow, we’ll make something to show these groups!”
Day 2: Classifying Animals (45 minutes)
- Review (10 minutes):
- Recap: “Who remembers one animal group? What’s special about it?”
- Play a quick game: Show a picture (e.g., turtle) and guess the group (reptile).
- Hands-On Activity: Sorting Practice (25 minutes):
- Lay out 10-15 animal pictures (e.g., bear, eagle, frog, snake, salmon).
- Sort them into piles: “Is this a mammal? Why?” (e.g., “Bear has fur!”).
- Help them notice traits: “Penguins don’t fly, but they’re still birds because of feathers!”
- Write the group name by each pile or use toy animals if available.
- Wrap-Up (10 minutes):
- Ask: “Which group had the most animals? What’s one new animal you learned?”
Day 3: Creating a Chart or Collage (45 minutes)
- Warm-Up (10 minutes):
- Say: “Let’s make a big picture or chart of our animal groups!” Decide together: chart (list style) or collage (pictures).
- Hands-On Activity: Chart/Collage Creation (25 minutes):
- Chart Option: Draw 5 columns on poster paper, label them (Mammals, Birds, Fish, Reptiles, Amphibians). Draw or glue 2-3 animals per group, write one trait (e.g., “Fur” under Mammals).
- Collage Option: Divide the paper into 5 sections, label each, and glue animal pictures in the right spots. Add a fun title (e.g., “Animal Party!”).
- Talk as they work: “Why does the lizard go here? What’s cool about fish?”
- Wrap-Up (10 minutes):
- Display it: “Look at our animal groups! Which one do you like best?”
- Share with family or take a photo to keep.
Assessment
- Informal Observation: Note their ability to name groups and match animals during sorting.
- Sorting Accuracy: Check if they correctly classify most animals (e.g., 80% right).
- Chart/Collage: Look for clear group labels and at least one example per group with a trait.
Extensions
- Go on a “zoo hunt” outside: Spot animals (e.g., squirrels, birds) and name their groups.
- Watch a short animal video (e.g., on YouTube Kids) and classify what they see.
- Add a “Mystery Animal” game: Describe traits (e.g., “I have scales and swim”) and guess the group.
Mid Level (Grade 3 to 5)
Subject: Food Webs
Alignment with Standards:
- Next Generation Science Standards (NGSS):
- 4-LS1-1: Construct an argument that plants and animals have internal and external structures that function to support survival, growth, behavior, and reproduction (links to food web roles).
- 5-LS2-1: Develop a model to describe the movement of matter among plants, animals, decomposers, and the environment (Note: Grade 4 builds toward this with food webs).
- Common Core State Standards (CCSS):
- CCSS.ELA-LITERACY.W.4.2: Write informative/explanatory texts to examine a topic and convey ideas and information clearly.
- CCSS.ELA-LITERACY.SL.4.5: Add audio recordings and visual displays to presentations when appropriate to enhance the development of main ideas or themes.
Objectives
- Understand that a food web shows how living things are connected through what they eat.
- Identify producers, consumers, and decomposers and their roles in a food web.
- Explore the interconnectedness of organisms by creating a food web poster.
- Develop skills in observation, organization, and explaining relationships.
Materials
- Large poster paper or cardboard
- Crayons, markers, or colored pencils
- Scissors and glue stick
- Pictures of organisms (printed from online sources, cut from magazines, or hand-drawn)
- Yarn or string (to connect organisms on the poster)
- Science book or article about food webs (e.g., Who Eats What? by Patricia Lauber or a National Geographic Kids page)
- Optional: Index cards for planning, tape
Activities
Day 1: Introduction to Food Webs (45 minutes)
- Warm-Up (10 minutes):
- Ask: “What did you eat today? Where did it come from—like plants or animals?”
- Say: “Today, we’re learning how everything in nature is connected by food!”
- Direct Instruction (15 minutes):
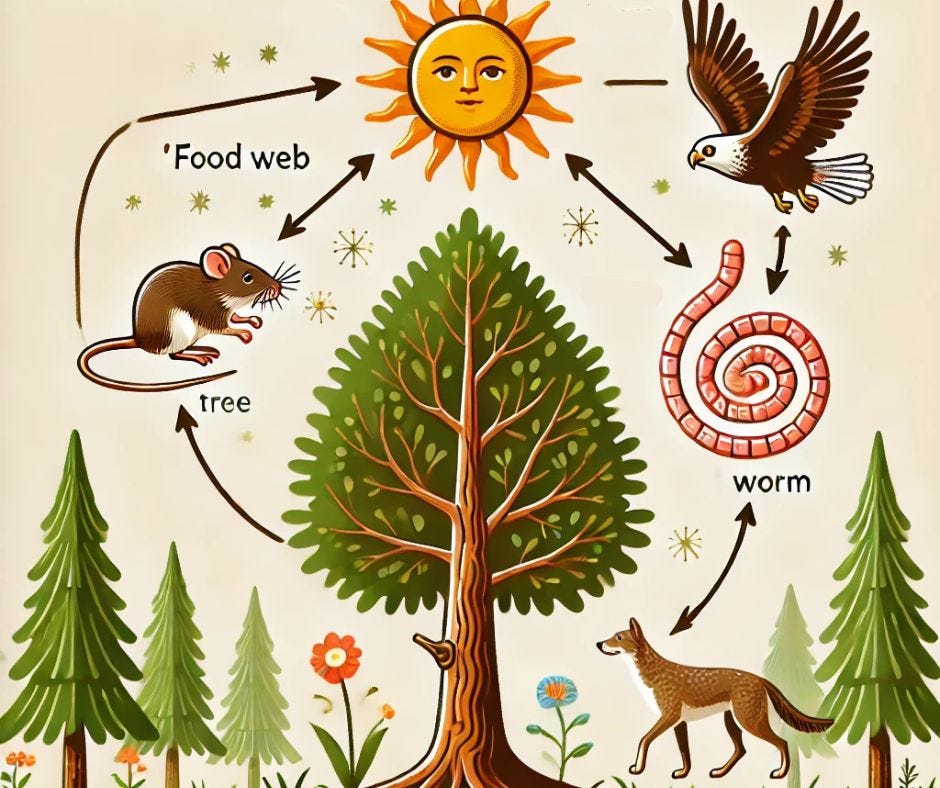
- Explain: “A food web is like a big map of who eats who. It’s messier than a food chain because everyone’s linked!”
- Introduce roles:
- Producers: Plants that make food from sunlight (e.g., grass, trees).
- Consumers: Animals that eat plants or other animals (e.g., rabbit, hawk).
- Decomposers: Break down dead stuff (e.g., worms, mushrooms).
- Example: “Sun → Grass → Rabbit → Hawk → Worm (when hawk dies).”
- Discussion (15 minutes):
- Read a short food web passage or show pictures. Ask: “What happens if the rabbit disappears? Who’s affected?”
- Wrap-Up (5 minutes):
- Say: “Next time, we’ll pick animals for our own food web!”
Day 2: Planning the Food Web (45 minutes)
- Review (10 minutes):
- Recap: “What’s a food web? Name one producer, consumer, and decomposer.”
- Quick game: “I’m grass. Who might eat me?” (e.g., rabbit).
- Hands-On Activity: Brainstorming (25 minutes):
- Choose an ecosystem (e.g., forest, pond, backyard).
- List 8-10 organisms on paper or cards (e.g., for forest: sun, tree, mouse, snake, hawk, worm, berry bush, deer, owl, mushroom).
- Sort them: “Which are producers? Consumers? Decomposers?”
- Draw arrows on paper: “Tree → Mouse → Snake → Hawk → Worm.” Add extra links (e.g., “Berry → Deer → Hawk”).
- Wrap-Up (10 minutes):
- Ask: “How many connections did we find? What happens if one animal goes away?”
Day 3: Creating a Food Web Poster (45 minutes)
- Warm-Up (10 minutes):
- Review the plan: “Who eats the mouse in our web? What’s a decomposer doing?”
- Hands-On Activity: Poster Creation (25 minutes):
- Draw or glue pictures of organisms on the poster (e.g., sun in the corner, plants at the bottom, animals above).
- Use yarn or draw arrows to connect them based on the plan (e.g., “Mouse eats berries, hawk eats mouse”).
- Label roles: Write “P” for producer, “C” for consumer, “D” for decomposer next to each.
- Add a title (e.g., “Forest Food Web Frenzy!”).
- Wrap-Up (10 minutes):
- Discuss: “Look at all these connections! What’s the busiest animal in our web?”
- Display it or share with family.
Assessment
- Informal Observation: Note their understanding of roles and connections during discussions.
- Planning Accuracy: Check if they correctly identify producers, consumers, and decomposers in their list.
- Poster: Ensure it shows at least 6 organisms with clear, accurate connections and labeled roles.
Extensions
- Add a “What If?” scenario: Remove one organism and redraw arrows.
- Explore a different ecosystem (e.g., ocean: algae → fish → shark).
- Watch a food web video (e.g., on BBC Earth Kids) and compare to their poster.
High Level (Grade 6 to 8)
Subject: The Circulatory System
Alignment with Standards:
- Next Generation Science Standards (NGSS):
- MS-LS1-3: Use argument supported by evidence for how the body is a system of interacting subsystems composed of groups of cells (focus on circulatory system).
- MS-LS1-2: Develop and use a model to describe the function of a cell as a whole and ways parts of cells contribute to the function (links to blood cells).
- Common Core State Standards (CCSS):
- CCSS.ELA-LITERACY.RST.6-8.7: Integrate quantitative or technical information expressed in words in a text with a version of that information expressed visually (e.g., in a flowchart or diagram).
- CCSS.ELA-LITERACY.WHST.6-8.2: Write informative/explanatory texts to examine a topic and convey ideas, concepts, and information through the selection, organization, and analysis of relevant content.
Objectives
- Understand the role of the circulatory system in transporting blood, oxygen, and nutrients throughout the body.
- Learn how blood circulates through the heart, lungs, and body in a continuous loop.
- Diagram the path of blood flow through the heart and identify key parts (e.g., chambers, vessels).
- Develop skills in scientific modeling and explaining biological processes.
Materials
- Notebook or paper for notes and diagrams
- Pencil, pen, or markers (red and blue for oxygenated/deoxygenated blood)
- Large paper or poster board for the final diagram
- Scissors, glue, and colored paper (optional for 3D effect)
- Diagram of the circulatory system (printed or hand-drawn reference)
- Science book or video (e.g., Human Body Systems by National Geographic or a Khan Academy clip)
- Optional: Stethoscope (to hear heartbeat), play-dough (for modeling)
Activities
Day 1: Introduction to the Circulatory System (45 minutes)
- Warm-Up (10 minutes):
- Ask: “What keeps us alive every second? Feel your pulse—what’s happening?”
- Say: “Today, we’re diving into the circulatory system—our body’s delivery service!”
- Direct Instruction (15 minutes):
- Explain: “The circulatory system moves blood around, carrying oxygen, food, and waste. The heart pumps it, blood vessels carry it, and blood does the work.”
- Key parts:
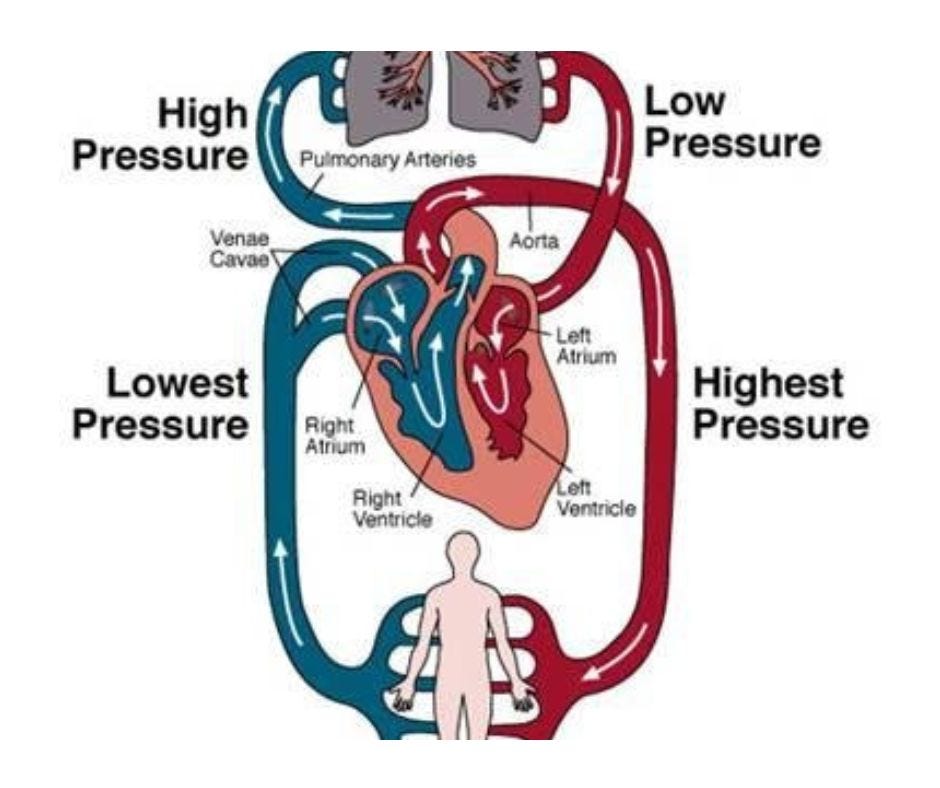
- Heart: Pump with 4 chambers (right/left atrium, right/left ventricle).
- Blood Vessels: Arteries (away), veins (back), capillaries (tiny swaps).
- Blood: Red cells (oxygen), white cells (fighters), plasma (liquid).
- Overview of flow: “Heart → Lungs (gets oxygen) → Heart → Body → Back to Heart.”
- Discussion (15 minutes):
- Watch a short video or read a page about the heart. Ask: “Why do we need oxygen in our blood? What happens if the heart stops?”
- Wrap-Up (5 minutes):
- Assign: “Draw a quick heart and guess where blood goes next!”
Day 2: Mapping Blood Flow (45 minutes)
- Review (10 minutes):
- Recap: “What’s the circulatory system’s job? Name one part of the heart.”
- Check their drawing: “Where did you send the blood?”
- Hands-On Activity: Diagram Basics (25 minutes):
- Use a reference diagram to teach blood flow:
- Right Atrium: Gets oxygen-poor blood from body (via veins).
- Right Ventricle: Pumps it to lungs.
- Lungs: Blood picks up oxygen.
- Left Atrium: Gets oxygen-rich blood from lungs.
- Left Ventricle: Pumps it to body (via arteries).
- Practice on paper: Draw a heart with 4 chambers, label them, and sketch arrows for flow (blue for oxygen-poor, red for oxygen-rich).
- Add major vessels: Vena cava (to right atrium), pulmonary artery (to lungs), pulmonary vein (from lungs), aorta (to body).
- Use a reference diagram to teach blood flow:
- Wrap-Up (10 minutes):
- Ask: “What’s the busiest part of the heart? Why do lungs matter in this loop?”
Day 3: Creating a Blood Flow Diagram (45 minutes)
- Warm-Up (10 minutes):
- Quick quiz: “Where does blood go after the right ventricle? After the left atrium?”
- Hands-On Activity: Poster Diagram (25 minutes):
- On large paper, draw a big heart with chambers, lungs (two ovals), and a body outline.
- Label parts: Right Atrium, Right Ventricle, Left Atrium, Left Ventricle, lungs, body.
- Use red/blue markers to trace blood flow with arrows:
- Vena cava → Right Atrium → Right Ventricle → Pulmonary Artery → Lungs (blue turns red) → Pulmonary Vein → Left Atrium → Left Ventricle → Aorta → Body → Back to Vena cava.
- Add a title (e.g., “Blood’s Big Adventure!”) and a short note (e.g., “Oxygen-poor blood is blue, oxygen-rich is red!”).
- Wrap-Up (10 minutes):
- Discuss: “What did you learn about blood’s journey? How does this keep us alive?”
- Display or share the poster.
Assessment
- Informal Observation: Note their grasp of circulation during discussions and practice.
- Practice Diagram: Check for correct chamber labels and basic flow direction.
- Final Poster: Ensure accurate flow (right side → lungs → left side → body) and key parts labeled.
Extensions
- Measure pulse before/after jumping jacks: “How does exercise change circulation?”
- Model a heart with play-dough, showing chambers and vessels.
- Research a circulatory issue (e.g., clogged arteries) and explain its impact.


LEAVE A COMMENT