
22Apr
Lesson Plan > Lesson 41 > Science
Lesson 41 covers:
- Elementary Level: Properties of Solids (Observe and describe solids (shape, texture, hardness)
- Mid Level: Properties of Matter (Explore density, mass, and volume)
- High Level: States of Matter (Explore solids, liquids, gases, and changes of state)
Elementary Level (Kinder to Grade 2)

Subject: Properties of Solids
Alignment with Standards:
- Next Generation Science Standards (NGSS):
- K-2-PS1-1: Plan and conduct an investigation to describe and classify different kinds of materials by their observable properties.
- Common Core State Standards (CCSS) – ELA:
- CCSS.ELA-LITERACY.SL.1.4: Describe people, places, things, and events with relevant details.
- CCSS.ELA-LITERACY.W.1.2: Write informative/explanatory texts that name a topic and supply some facts.
Lesson Objectives:
By the end of the lesson, the student will be able to:
- Observe and describe solids based on shape, texture, and hardness.
- Sort different solids into categories based on their properties.
- Draw and label a solid object, noting its key properties.
Materials Needed:
- A variety of solid objects (e.g., rock, wooden block, sponge, metal spoon, rubber ball, plastic toy, cotton ball, paperclip)
- Sorting trays or small containers (for categorizing objects)
- Magnifying glass (optional, for closer observation)
- Worksheet (with space for drawing and labeling)
- Pencils and crayons
- Chart paper or whiteboard for recording observations
Lesson Activities:
1. Introduction (5-10 min)
- Engage: Show the student a few solid objects and ask:
- “What do you notice about these objects?”
- “How are they different from liquids or gases?”
- Explain: Define solids as materials that have a fixed shape and do not flow like liquids.
- Demonstrate: Compare a solid (like a rock) with a liquid (like water) to reinforce the concept.
2. Hands-On Exploration (15 min)
- Observation: Have the student examine each solid object and describe:
- Shape (round, square, flat, etc.)
- Texture (smooth, rough, bumpy, soft, hard)
- Hardness (Can you bend or scratch it?)
- Sorting Activity: Ask the student to group objects based on:
- Hard vs. Soft
- Smooth vs. Rough
- Shape Categories
3. Drawing & Labeling (10 min)
- The student will choose one solid object, draw it, and label its properties (e.g., “This rock is hard and rough.”).
- Encourage them to write a simple sentence describing the object.
4. Wrap-Up Discussion (5 min)
- Ask:
- “Which object was the hardest? Which was the softest?”
- “Did any objects surprise you?”
- Review key terms: solid, shape, texture, hardness.
Assessment:
- Informal: Observe if the student can accurately describe and sort objects.
- Formal: Check the drawing and labeling worksheet for correct descriptions.
Extension Activity (Optional):
- “Solid Hunt” – Have the student find and describe 3 solids at home.
- Experiment: Test if some solids can change shape (e.g., bending a paperclip vs. a rock).
Mid Level (Grade 3 to 5)
Subject: Properties of Matter
Alignment with Standards:
- Next Generation Science Standards (NGSS):
- 5-PS1-3: Make observations and measurements to identify materials based on their properties (e.g., density).
- Common Core State Standards (CCSS) – Math & ELA:
- CCSS.MATH.CONTENT.4.MD.A.1: Measure and estimate liquid volumes and masses.
- CCSS.ELA-LITERACY.W.4.2: Write informative/explanatory texts to examine a topic.
Lesson Objectives:
By the end of the lesson, the student will be able to:
- Define mass, volume, and density in simple terms.
- Predict and test whether objects will sink or float based on their density.
- Measure and compare the mass and volume of different objects.
- Explain why some objects float while others sink.
Materials Needed:
- For the Experiment:
- A large clear container (bucket, bowl, or aquarium) filled with water
- Various small objects (e.g., coin, cork, plastic toy, rubber ball, metal spoon, wooden block, grape, eraser)
- Kitchen scale (to measure mass in grams)
- Graduated cylinder or measuring cup (for volume)
- Ruler (optional, for measuring dimensions)
- Recording Sheet:
- Table for predictions and results (Object | Mass | Volume | Sink/Float?)
- Pencil and science notebook
Lesson Activities:
1. Introduction (10 min)
- Engage: Ask the student:
- “Why do some things sink in water while others float?”
- “Does a bigger object always sink? Why or why not?”
- Explain Key Concepts:
- Mass: How much “stuff” is in an object (measured in grams).
- Volume: How much space an object takes up (measured in mL or cm³).
- Density = Mass ÷ Volume (If an object is denser than water, it sinks; if less dense, it floats).
- Demonstrate: Compare a metal spoon (sinks) and a plastic spoon (floats).
2. Hands-On Experiment (25 min)
A. Predict & Test (Sink or Float?)
- Have the student predict whether each object will sink or float and record guesses.
- Test each object one by one and record results.
B. Measure Mass & Volume (Optional Extension for Advanced Learners)
- Mass: Weigh each object on the scale (grams).
- Volume:
- For regular shapes (cube, sphere), measure dimensions and calculate (L × W × H).
- For irregular shapes, use water displacement (record water level before/after adding object).
C. Calculate Density (If Applicable)
- Use the formula Density = Mass ÷ Volume to compare objects.
3. Analysis & Discussion (10 min)
- Ask:
- “Which objects floated? Were they lighter, bigger, or both?”
- “Did any results surprise you? Why?”
- Key Takeaway:
- Floating depends on density, not just size or weight.
- Example: A tiny pebble sinks (high density), while a big wooden block floats (low density).
4. Wrap-Up (5 min)
- Real-World Connection:
- “How do boats float even though they’re heavy?” (Hollow shape lowers density.)
- Exit Ticket: Have the student write 1-2 sentences explaining why some objects float.
Assessment:
- Informal: Observe accuracy in predictions and explanations during the experiment.
- Formal: Check the completed recording sheet and exit ticket for understanding.
Extension Activities (Optional):
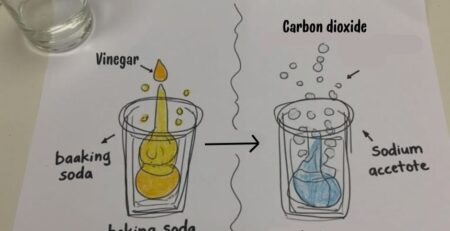
- Layered Liquids: Test density by layering honey, dish soap, water, and oil.
- DIY Boat Challenge: Build a foil boat and see how many pennies it can hold before sinking.
High Level (Grade 6 to 8)
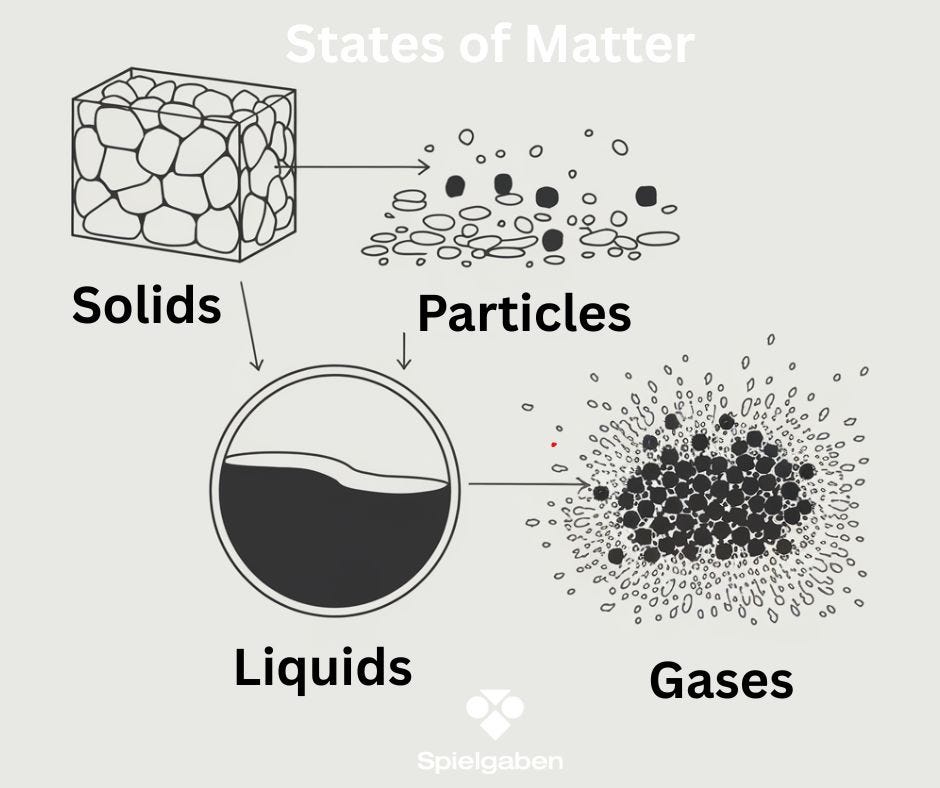
Subject: States of Matter
Alignment with Standards:
- Next Generation Science Standards (NGSS):
- MS-PS1-4: Develop a model that predicts and describes changes in particle motion, temperature, and state of a pure substance when thermal energy is added or removed.
- Common Core State Standards (CCSS) – ELA & Math:
- CCSS.ELA-LITERACY.RST.6-8.3: Follow precisely a multistep procedure when carrying out experiments.
- CCSS.MATH.CONTENT.7.RP.A.2: Recognize proportional relationships in real-world contexts (e.g., temperature and phase changes).
Lesson Objectives:
By the end of the lesson, the student will be able to:
- Describe the particle behavior in solids, liquids, and gases.
- Explain how thermal energy affects the state of matter.
- Conduct experiments to observe melting and freezing.
- Graph and analyze temperature changes during phase transitions.
Materials Needed:
For Experiments:
- Melting Ice Observation:
- Ice cubes
- Two small plates (one at room temp, one slightly warmed)
- Thermometer (digital or analog)
- Stopwatch/timer
- Freezing Liquids:
- Water, cooking oil, and honey (to compare freezing rates)
- Small containers or cups
- Freezer or ice bath
- Additional Supplies:
- Graph paper or spreadsheet (for temperature vs. time graphs)
- Science notebook for recording observations
Lesson Activities:
1. Introduction (15 min)
- Engage: Show an ice cube, water, and steam (from a kettle). Ask:
- “How are these three things the same? How are they different?”
- Direct Instruction:
- Review particle models of solids (fixed, vibrating), liquids (flowing, sliding), and gases (spread out, fast-moving).
- Introduce phase changes (melting, freezing, vaporization, condensation).
- Discuss thermal energy’s role in breaking/forming molecular bonds.
2. Hands-On Experiments (30 min)
A. Melting Race (Comparing Thermal Energy Transfer)
- Place one ice cube on a room-temperature plate and another on a slightly warmed plate.
- Time how long each takes to melt completely.
- Record observations (e.g., puddles form faster on the warm plate).
B. Freezing Different Liquids
- Pour equal amounts of water, oil, and honey into separate containers.
- Place in a freezer or ice bath. Check every 5 minutes to observe which freezes first.
- Discuss results (water freezes fastest due to molecular structure).
Optional Extension:
- Use a thermometer to track temperature changes during melting/freezing and create a time-temperature graph.
3. Data Analysis & Discussion (15 min)
- Graphing: Plot temperature vs. time for melting ice (flat line at 0°C until fully melted).
- Key Questions:
- “Why does temperature stay constant during melting/freezing?” (Energy breaks bonds instead of raising temp.)
- “Why did oil freeze slower than water?” (Different intermolecular forces.)
4. Real-World Connections (10 min)
- Applications:
- How salt lowers ice’s melting point (road safety in winter).
- Why sweat cools our bodies (liquid-to-gas energy absorption).
- Exit Ticket:
- “Explain how a puddle disappears on a sunny day using particle theory.”
Assessment:
- Lab Report: Student records hypotheses, procedures, and explanations.
- Exit Ticket: Short written response on particle behavior during phase changes.
Extensions/Modifications:
- Advanced: Research plasma (4th state of matter) or dry ice sublimation.
- Simplified: Focus only on melting/freezing water with temperature tracking.


LEAVE A COMMENT