Lesson Plan > Lesson 50 > Science
Lesson 50 covers:
- Elementary Level: Changes in Matter (Melting and Freezing)
- Mid Level: Light and Reflection
- High Level: Chemical Reactions and Equations
Elementary Level (Kinder to Grade 2)
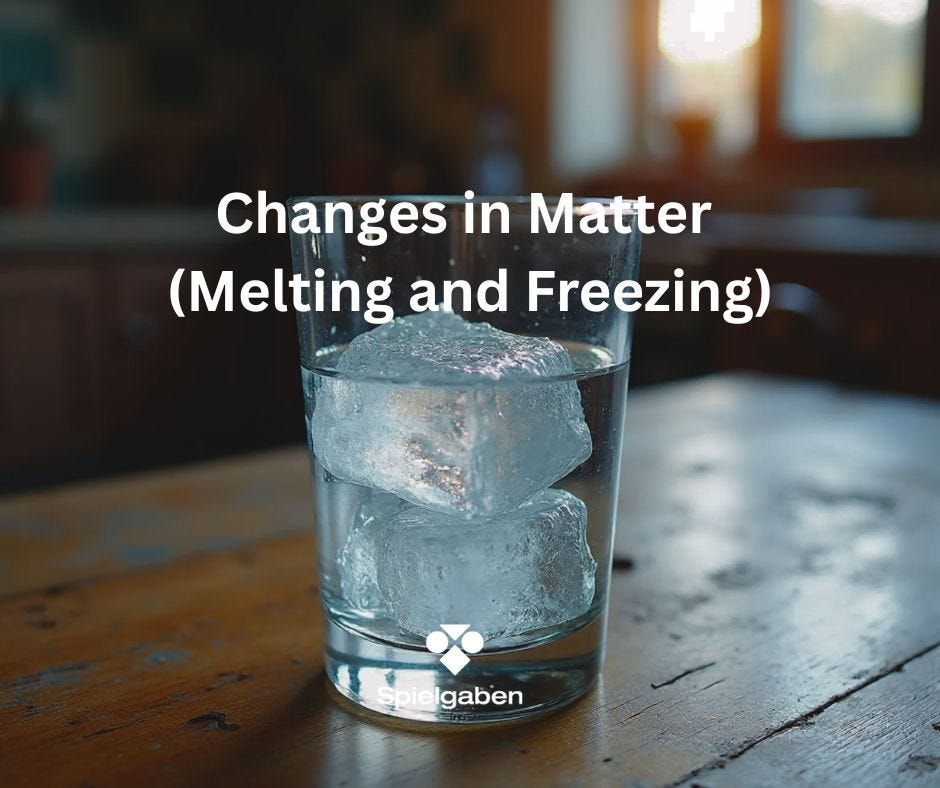
Subject: Changes in Matter (Melting and Freezing)
Alignment with Standards:
- Next Generation Science Standards (NGSS):
- 2-PS1-4: Construct an argument with evidence that some changes caused by heating or cooling can be reversed and some cannot.
- Common Core State Standards (CCSS) Connections:
- CCSS.ELA-LITERACY.SL.1.1: Participate in collaborative conversations.
- CCSS.ELA-LITERACY.SL.1.5: Add drawings or other visual displays to descriptions.
Lesson Objectives:
By the end of this lesson, the student will be able to:
- Define melting (solid → liquid) and freezing (liquid → solid).
- Observe and describe how heat causes ice to melt and cold causes water to freeze.
- Record observations using simple drawings or words.
Materials Needed:
✅ Ice cubes
✅ Small bowl or plate
✅ Warm water (for melting demonstration)
✅ Freezer-safe container (for freezing demonstration)
✅ Timer or clock
✅ Paper and crayons/markers for recording observations
✅ Magnifying glass (optional)
Lesson Activities:
1. Introduction (10 minutes)
- Engage: Show an ice cube and ask:
- “What happens when we leave ice out on the table?”
- “Can we turn water back into ice? How?”
- Explain: Introduce key terms—solid, liquid, melting, freezing.
- Image Prompt: Show a simple diagram of the water cycle (ice → water → ice).
2. Ice Melting Experiment (15 minutes)
- Procedure:
- Place an ice cube on a plate.
- Observe and time how long it takes to melt at room temperature.
- Speed up melting by pouring a little warm water over another ice cube.
- Discuss: “Which melted faster? Why?”
- Record Observations: Draw before/after pictures.
3. Water Freezing Observation (15 minutes)
- Procedure:
- Pour water into a small container.
- Place it in the freezer and check every 10 minutes.
- Discuss changes: “What happened to the water? Why?”
- Optional: Compare freezing times with different container sizes.
4. Wrap-Up Discussion (10 minutes)
- Review Key Concepts:
- “What makes ice melt?” (Heat)
- “What makes water freeze?” (Cold)
- Real-World Connection:
- “Where do we see melting/freezing in everyday life?” (Popsicles, snow, ice cream)
- Exit Question: “If we left this melted ice outside in winter, what would happen?”
Assessment:
- Informal: Verbal responses during discussion.
- Formative: Student’s drawings/labels showing melting and freezing.
Extension Activities (Optional):
🔹 Predict & Test: Does salt make ice melt faster? (Sprinkle salt on one ice cube.)
🔹 Art Connection: Draw a sunny day (melting) vs. a snowy day (freezing).
Mid Level (Grade 3 to 5)
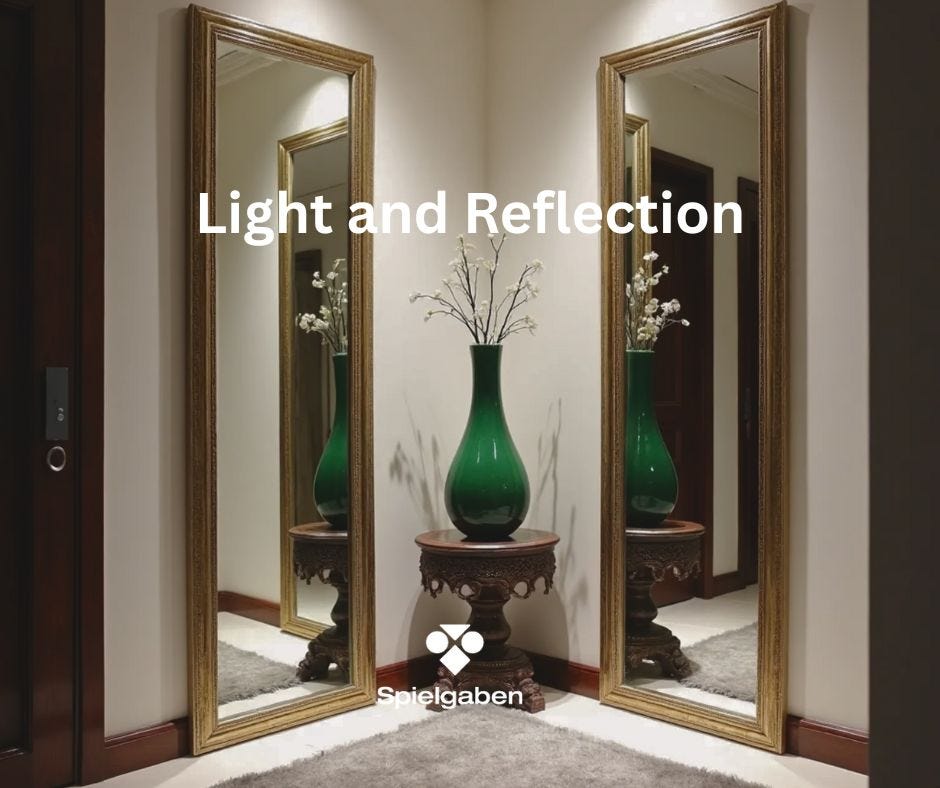
Subject: Light and Reflection
Alignment with Standards:
- Next Generation Science Standards (NGSS):
- 4-PS4-2: Develop a model to describe that light reflecting from objects and entering the eye allows objects to be seen.
- 4-PS3-2: Make observations to provide evidence that energy can be transferred by light.
- Common Core State Standards (CCSS) Connections:
- CCSS.ELA-LITERACY.SL.4.1: Engage in collaborative discussions.
- CCSS.ELA-LITERACY.W.4.2: Write informative/explanatory texts (lab reports).
Lesson Objectives:
By the end of this lesson, the student will be able to:
- Explain that light travels in straight lines and can be reflected.
- Conduct experiments using mirrors to demonstrate reflection.
- Predict and test how changing angles affect reflected light.
- Record observations and draw conclusions in a simple lab report.
Materials Needed:
✅ Small mirrors (2-3)
✅ Flashlight (or laser pointer, with safety precautions)
✅ White paper or poster board
✅ Ruler or straightedge
✅ Protractor (optional, for angle measurement)
✅ Small objects (e.g., toy figurine, coin)
✅ Dark room or shaded area (for better light observation)
✅ Science journal or worksheet for recording observations
Lesson Activities:
1. Introduction (15 minutes)
- Engage: Ask:
- “How do we see objects?”
- “Why can you see yourself in a mirror but not in a piece of paper?”
- Explain: Discuss key concepts—light travels in straight lines, reflection, angle of incidence = angle of reflection.
- Image Prompt: Show a diagram of light reflecting off a mirror (with labeled angles).
2. Mirror Reflection Experiments (30 minutes)
Experiment 1: Basic Reflection
- Procedure:
- Place a small object in front of a mirror.
- Shine a flashlight toward the mirror.
- Observe where the light reflects and discuss why.
- Trace the path of light with a ruler (light source → mirror → reflected spot).
Experiment 2: Changing Angles
- Procedure:
- Hold a mirror at different angles while shining a flashlight.
- Predict where the light will reflect before testing.
- Use a protractor to measure angles (optional for advanced learners).
Experiment 3: Double Mirror Reflection (Extension)
- Procedure:
- Place two mirrors facing each other at different angles (e.g., 90°).
- Place an object between them and observe multiple reflections.
- Discuss: “Why do we see more reflections when mirrors face each other?”
3. Wrap-Up Discussion (15 minutes)
- Review Key Concepts:
- “How does light travel?” (Straight lines)
- “What happens when light hits a mirror?” (Reflects at the same angle)
- Real-World Connection:
- “Where do we see reflections in everyday life?” (Windows, water, glasses, telescopes)
- Exit Question: “If you wanted to reflect light around a corner, how would you position the mirrors?”
Assessment:
- Informal: Participation in experiments and discussion.
- Formative: Lab report or drawn diagrams showing light reflection paths.
Extension Activities (Optional):
🔹 Periscope Making: Construct a simple periscope using mirrors and cardboard.
🔹 Shadow vs. Reflection: Compare how shadows (blocked light) differ from reflections (bounced light).
🔹 Writing Connection: Explain how mirrors help in telescopes or car rearview mirrors.
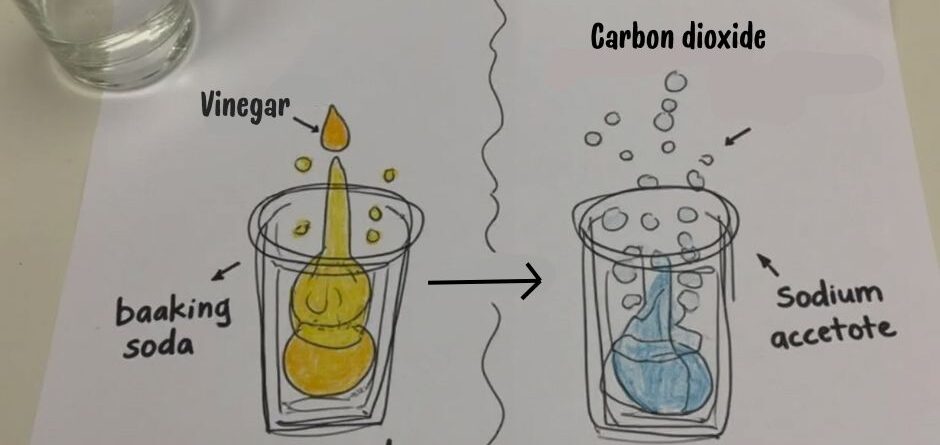
High Level (Grade 6 to 8)
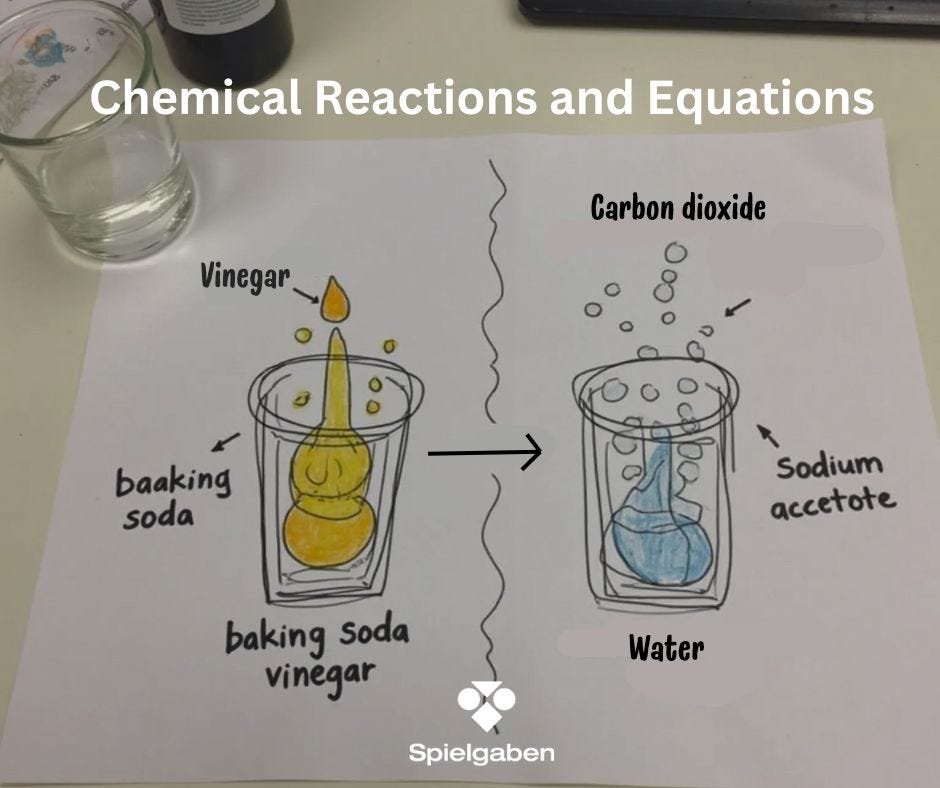
Subject: Chemical Reactions and Equations
Alignment with Standards:
- Next Generation Science Standards (NGSS):
- MS-PS1-2: Analyze and interpret data on the properties of substances before and after chemical reactions.
- MS-PS1-5: Develop and use a model to describe how the total number of atoms is conserved in a chemical reaction.
- Common Core State Standards (CCSS) Connections:
- CCSS.ELA-LITERACY.RST.6-8.3: Follow multistep procedures in scientific experiments.
- CCSS.ELA-LITERACY.WHST.6-8.2: Write informative/explanatory texts (lab reports).
Lesson Objectives:
By the end of this lesson, the student will be able to:
- Identify five signs of a chemical reaction (gas production, temperature change, color change, precipitate formation, odor change).
- Conduct experiments with vinegar (acetic acid) and baking soda (sodium bicarbonate) to observe chemical changes.
- Write a simple balanced chemical equation for the reaction.
- Explain the Law of Conservation of Mass in the context of the experiment.
Materials Needed:
✅ Baking soda (sodium bicarbonate)
✅ Vinegar (acetic acid, 5% solution)
✅ Measuring spoons & cups
✅ Clear plastic cups or beakers
✅ Balloon (for gas collection experiment)
✅ Thermometer (optional, for temperature measurement)
✅ Matches/lighter & candle (teacher demonstration only)
✅ Safety goggles & gloves
✅ Science notebook & pen/pencil
Lesson Activities:
1. Introduction (15 minutes)
- Engage: Ask:
- “What happens when you mix vinegar and baking soda? Is this a physical or chemical change?”
- “How do you know if a chemical reaction has occurred?”
- Explain: Introduce the five signs of chemical reactions and discuss reactants vs. products.
- Image Prompt: Show a molecular diagram of the reaction:
NaHCO₃ + HC₂H₃O₂ → CO₂ + H₂O + NaC₂H₃O₂
2. Hands-On Experiments (40 minutes)
Experiment 1: Classic Baking Soda & Vinegar Reaction
- Procedure:
- Mix 1 tbsp baking soda + ¼ cup vinegar in a clear cup.
- Observe bubbling (gas production) and temperature change (endothermic reaction).
- Discuss: “What gas is produced? How could we test for it?”
Experiment 2: Balloon Inflation (Gas Collection)
- Procedure:
- Place 2 tbsp baking soda in a balloon.
- Pour ½ cup vinegar into a bottle.
- Stretch the balloon over the bottle’s mouth, then dump in the baking soda.
- Observe CO₂ gas inflating the balloon.
Experiment 3: Flame Test (Teacher Demo Only)
- Procedure:
- Light a candle.
- Pour CO₂ gas (from the reaction) near the flame.
- Observe: “Why does the flame go out?” (CO₂ is denser than air and displaces oxygen.)
3. Data Analysis & Discussion (20 minutes)
- Balanced Chemical Equation Practice:
- Write: NaHCO₃ + HC₂H₃O₂ → CO₂ + H₂O + NaC₂H₃O₂
- Count atoms on both sides to show conservation of mass.
- Real-World Connection:
- “Where do we see chemical reactions in daily life?” (Cooking, rusting, digestion)
- Exit Question: “If you used 10g of baking soda, how much CO₂ should be produced?”
Assessment:
- Informal: Participation in experiments and discussion.
- Formative: Lab report including:
- Observations of chemical changes.
- Balanced chemical equation.
- Explanation of conservation of mass.
Extension Activities (Optional):
🔹 Quantitative Experiment: Measure mass before/after reaction to prove conservation of mass.
🔹 pH Testing: Compare vinegar’s acidity before/after the reaction.
🔹 Research Project: Explore real-world uses of CO₂ (fire extinguishers, carbonation).


LEAVE A COMMENT