
28May
Lesson Plan > Lesson 56 > Science
Lesson 56 covers:
- Elementary Level: Light and Shadows
- Mid Level: Heat and Temperature
- High Level: Heat Transfer (Conduction, Convection, Radiation)
Elementary Level (Kinder to Grade 2)
Subject: Light and Shadows
Alignment with Standards:
- Next Generation Science Standards (NGSS):
- 1-PS4-3: Plan and conduct investigations to determine the effect of placing objects made with different materials in the path of a beam of light.
- Common Core State Standards (CCSS) ELA:
- CCSS.ELA-LITERACY.SL.1.1: Participate in collaborative conversations.
- CCSS.ELA-LITERACY.SL.1.5: Add drawings or visual displays to descriptions.
- Common Core State Standards (CCSS) Math:
- CCSS.MATH.CONTENT.1.MD.A.1: Order objects by length (shadow measurement).
Lesson Objectives:
By the end of the lesson, students will be able to:
- Define light and shadow in simple terms.
- Explain how shadows are formed when light is blocked.
- Conduct hands-on experiments using flashlights to observe shadow changes.
- Create a shadow tracing artwork.
Materials Needed:
- Flashlight (or smartphone with flashlight feature)
- Small toys or objects (plastic animals, blocks, etc.)
- White paper (for shadow tracing)
- Pencils or markers
- A dark room (or dimmed lighting)
- Ruler (optional, for measuring shadows)
- Chart paper or whiteboard for recording observations
Lesson Activities:
1. Introduction (10 minutes)
- Engage: Ask the student:
- “What happens when you stand outside on a sunny day? Do you see a dark shape under your feet?”
- “Why do you think that happens?”
- Explain:
- Light travels in straight lines. When an object blocks light, it creates a dark area behind it called a shadow.
- Show a simple diagram (or draw one) of light hitting an object and casting a shadow.
2. Shadow Exploration Activity (15 minutes)
- Experiment with Flashlights:
- Darken the room and shine a flashlight at a toy.
- Move the flashlight closer/farther—ask: “What happens to the shadow?” (It gets bigger/smaller.)
- Tilt the flashlight—ask: “Does the shadow change direction?”
- Record Observations:
- Draw or write findings on chart paper (e.g., “Closer light = bigger shadow”).
3. Shadow Tracing Art (15 minutes)
- Place an object (like a toy dinosaur) on white paper.
- Shine the flashlight so the shadow falls on the paper.
- Trace the shadow with a pencil.
- Repeat with different objects and compare shapes.
4. Wrap-Up Discussion (5-10 minutes)
- Review Key Concepts:
- “What makes a shadow?” (Light + object blocking light)
- “How can we change a shadow?” (Move light, change object position)
- Real-World Connection:
- “When do you see shadows outside?” (Sunny days, streetlights at night)
Assessment:
- Informal: Observe participation in experiments.
- Art-Based: Check shadow tracings for accuracy.
- Verbal: Ask the student to explain shadows in their own words.
Extensions/Modifications:
- For Advanced Learners: Measure shadows with a ruler at different times of day.
- For Struggling Learners: Use larger objects for clearer shadows.
- Outdoor Activity: Trace shadows with sidewalk chalk at different times.
Mid Level (Grade 3 to 5)
Subject: Heat and Temperature
Alignment with Standards:
- Next Generation Science Standards (NGSS):
- 4-PS3-2: Make observations to provide evidence that energy can be transferred from place to place by heat (conduction, convection, radiation).
- 4-PS3-4: Apply scientific ideas to design and test a device that converts energy from one form to another.
- Common Core State Standards (CCSS) ELA:
- CCSS.ELA-LITERACY.SL.4.1: Engage in collaborative discussions.
- CCSS.ELA-LITERACY.W.4.2: Write informative/explanatory texts (lab observations).
- Common Core State Standards (CCSS) Math:
- CCSS.MATH.CONTENT.4.MD.A.1: Measure temperature in degrees Celsius/Fahrenheit.
Lesson Objectives:
By the end of the lesson, students will be able to:
- Define heat and temperature and explain the difference.
- Describe the three types of heat transfer: conduction, convection, and radiation.
- Conduct experiments demonstrating each type of heat transfer.
- Record and analyze data from hands-on activities.
Materials Needed:
- Conduction Experiment:
- Metal spoon, plastic spoon, wooden spoon
- Cup of hot water
- Butter or small wax pieces
- Convection Experiment:
- Clear glass bowl
- Cold water + red food coloring (for “hot” water)
- Blue food coloring (for “cold” water)
- Dropper
- Radiation Experiment:
- Lamp with incandescent bulb (or sunlight + magnifying glass)
- Thermometer
- Dark vs. light-colored paper
- General Supplies:
- Thermometer (digital or analog)
- Science journal/notebook
- Chart paper or whiteboard for recording observations
Lesson Activities:
1. Introduction (10 minutes)
- Engage: Ask the student:
- “Why does a metal spoon feel hotter than a plastic one in soup?”
- “Why does warm air rise?”
- Explain Key Concepts:
- Heat: Energy transferred between objects due to temperature differences.
- Temperature: A measure of how hot/cold something is.
- Three Heat Transfer Types:
- Conduction: Heat moving through solids (e.g., spoon in hot water).
- Convection: Heat moving through fluids (liquids/gases; e.g., boiling water).
- Radiation: Heat traveling as invisible waves (e.g., sunlight warming skin).
2. Hands-On Experiments (30 minutes)
A. Conduction Experiment (10 min)
- Place butter on the tips of metal, plastic, and wooden spoons.
- Rest the spoons in a cup of hot water.
- Observe which butter melts first (metal conducts heat fastest!).
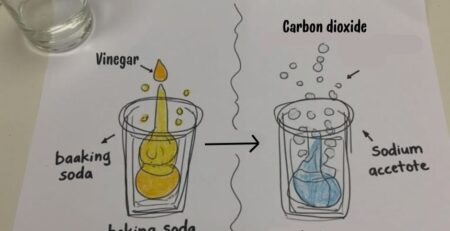
B. Convection Experiment (10 min)
- Fill a clear bowl with room-temperature water.
- Add blue cold water (with ice) to one side and red warm water to the other.
- Watch how the colors move (warm rises, cold sinks).
C. Radiation Experiment (10 min)
- Place a thermometer on dark paper and another on light paper under a lamp.
- Record temperatures after 5 minutes (darker colors absorb more heat).
3. Data Recording & Discussion (15 minutes)
- Science Journal Prompts:
- “Which spoon conducted heat best? Why?”
- “How did the warm and cold water move? Draw it!”
- “Did the dark or light paper get hotter? Why?”
- Real-World Connections:
- “How does conduction help cook food?” (Pan heating).
- “Where do we see convection in nature?” (Weather patterns).
- “How does radiation keep Earth warm?” (Sun’s rays).
4. Wrap-Up (5 minutes)
- Review: Ask the student to summarize the three heat transfer types.
- Exit Ticket: “Design a house that stays cool in summer using what you learned!”
Assessment:
- Lab Participation: Did the student follow procedures and ask questions?
- Science Journal: Accuracy of observations and explanations.
- Verbal Explanation: Can they describe conduction/convection/radiation?
Extensions/Modifications:
- For Advanced Learners: Test insulation materials (e.g., cotton vs. foil) to block heat transfer.
- For Struggling Learners: Use pre-made videos (e.g., boiling water for convection).
- Project-Based: Build a solar oven using radiant heat!
High Level (Grade 6 to 8)
Subject: Heat Transfer (Conduction, Convection, Radiation)
Alignment with Standards:
- Next Generation Science Standards (NGSS):
- MS-PS3-3: Apply scientific principles to design, construct, and test a device that minimizes or maximizes thermal energy transfer.
- MS-PS3-4: Plan an investigation to determine the relationships among energy transfer, temperature change, and specific heat of materials.
- Common Core State Standards (CCSS) ELA:
- CCSS.ELA-LITERACY.RST.6-8.3: Follow precisely a multistep procedure when carrying out experiments.
- CCSS.ELA-LITERACY.WHST.6-8.1.B: Support claims with logical reasoning and relevant evidence.
- Common Core State Standards (CCSS) Math:
- CCSS.MATH.CONTENT.7.RP.A.2: Analyze proportional relationships (e.g., temperature change rates).
Lesson Objectives:
By the end of the lesson, students will be able to:
- Explain the molecular-level differences between conduction, convection, and radiation.
- Design and conduct experiments to compare heat transfer rates in different materials.
- Analyze data to determine which materials are best conductors/insulators.
- Apply knowledge to real-world scenarios (e.g., home insulation, cooking methods).
Materials Needed:
Conduction Experiments:
- Various materials (copper wire, aluminum foil, wood, plastic, glass rod)
- Hot plate or mug of boiling water
- Thermometer (digital)
- Wax or butter (to observe melting points)
Convection Experiments:
- Clear glass tank or large beaker
- Red and blue food coloring
- Ice cubes + warm water
- Dropper
Radiation Experiments:
- Infrared thermometer (or regular thermometer)
- Black vs. white construction paper
- Heat lamp or sunlight
General Supplies:
- Lab notebook/graph paper for data recording
- Stopwatch/timer
- Safety goggles & gloves
Lesson Activities:
1. Introduction (15 minutes)
- Engage: Show a video clip (e.g., frying an egg on a hot car hood) and ask:
- “How is heat moving in this scenario?”
- Direct Instruction:
- Conduction: Heat transfer through solids (e.g., metal spoon in soup).
- Convection: Heat transfer through fluids (e.g., boiling water, weather systems).
- Radiation: Heat transfer via electromagnetic waves (e.g., sunlight, microwaves).
2. Hands-On Experiments (60 minutes)
A. Conduction Race (20 min)
- Attach small wax pieces to different materials (copper, wood, plastic).
- Place one end in hot water and time how long each takes to melt.
- Data Analysis: Rank materials by conductivity.
B. Convection Currents (20 min)
- Fill a tank with room-temperature water.
- Add blue ice water to one side and red warm water to the other.
- Observe and sketch current patterns.
C. Radiation Absorption (20 min)
- Place thermometers on black vs. white paper under a heat lamp.
- Record temperature changes every 2 minutes for 10 minutes.
- Discussion: Why do dark colors absorb more radiation?
3. Data Analysis & Engineering Challenge (30 minutes)
- Graph Results: Create bar graphs comparing conduction rates or radiation absorption.
- Design Challenge:
- “Using what you learned, design a lunchbox that keeps food cold for 4 hours.”
- Sketch and label materials (e.g., aluminum foil lining for reflection).
4. Wrap-Up & Real-World Connections (15 minutes)
- Discussion Questions:
- “Why are pots made of metal but handles made of plastic?”
- “How does convection cause ocean currents?”
- Exit Ticket:
- “Describe one way engineers use heat transfer principles in technology.”
Assessment:
- Lab Report Rubric:
- Hypothesis (10%)
- Data Collection (30%)
- Analysis/Conclusion (30%)
- Real-World Application (30%)
- Participation: Engagement in discussions and safety practices.
Extensions/Modifications:
- Advanced Learners: Calculate heat transfer rates using Q = mcΔT (simplified).
- Struggling Learners: Pre-cut materials or use digital simulations (e.g., PhET Energy Forms).
- Project-Based: Build and test a solar water heater with recycled materials.


LEAVE A COMMENT