The Law of Opposites: Learning Through Contrast and Harmony
We’ve explored how children make the inner external through active play with materials. But here’s a question: How does a three-year-old who’s never been formally taught geometry develop an understanding of “round” versus “square”?
Through contrast.
Friedrich Froebel discovered something profound about how human minds actually work: recognition and understanding are only possible through the comparison of opposites.
This isn’t just a teaching technique. It’s how perception itself functions.
Today we’re diving into Froebel’s “Law of Opposites” (also called the Law of Polarity)—one of his most practical principles and one you can implement immediately with materials you likely already have.
A World Built on Contrast
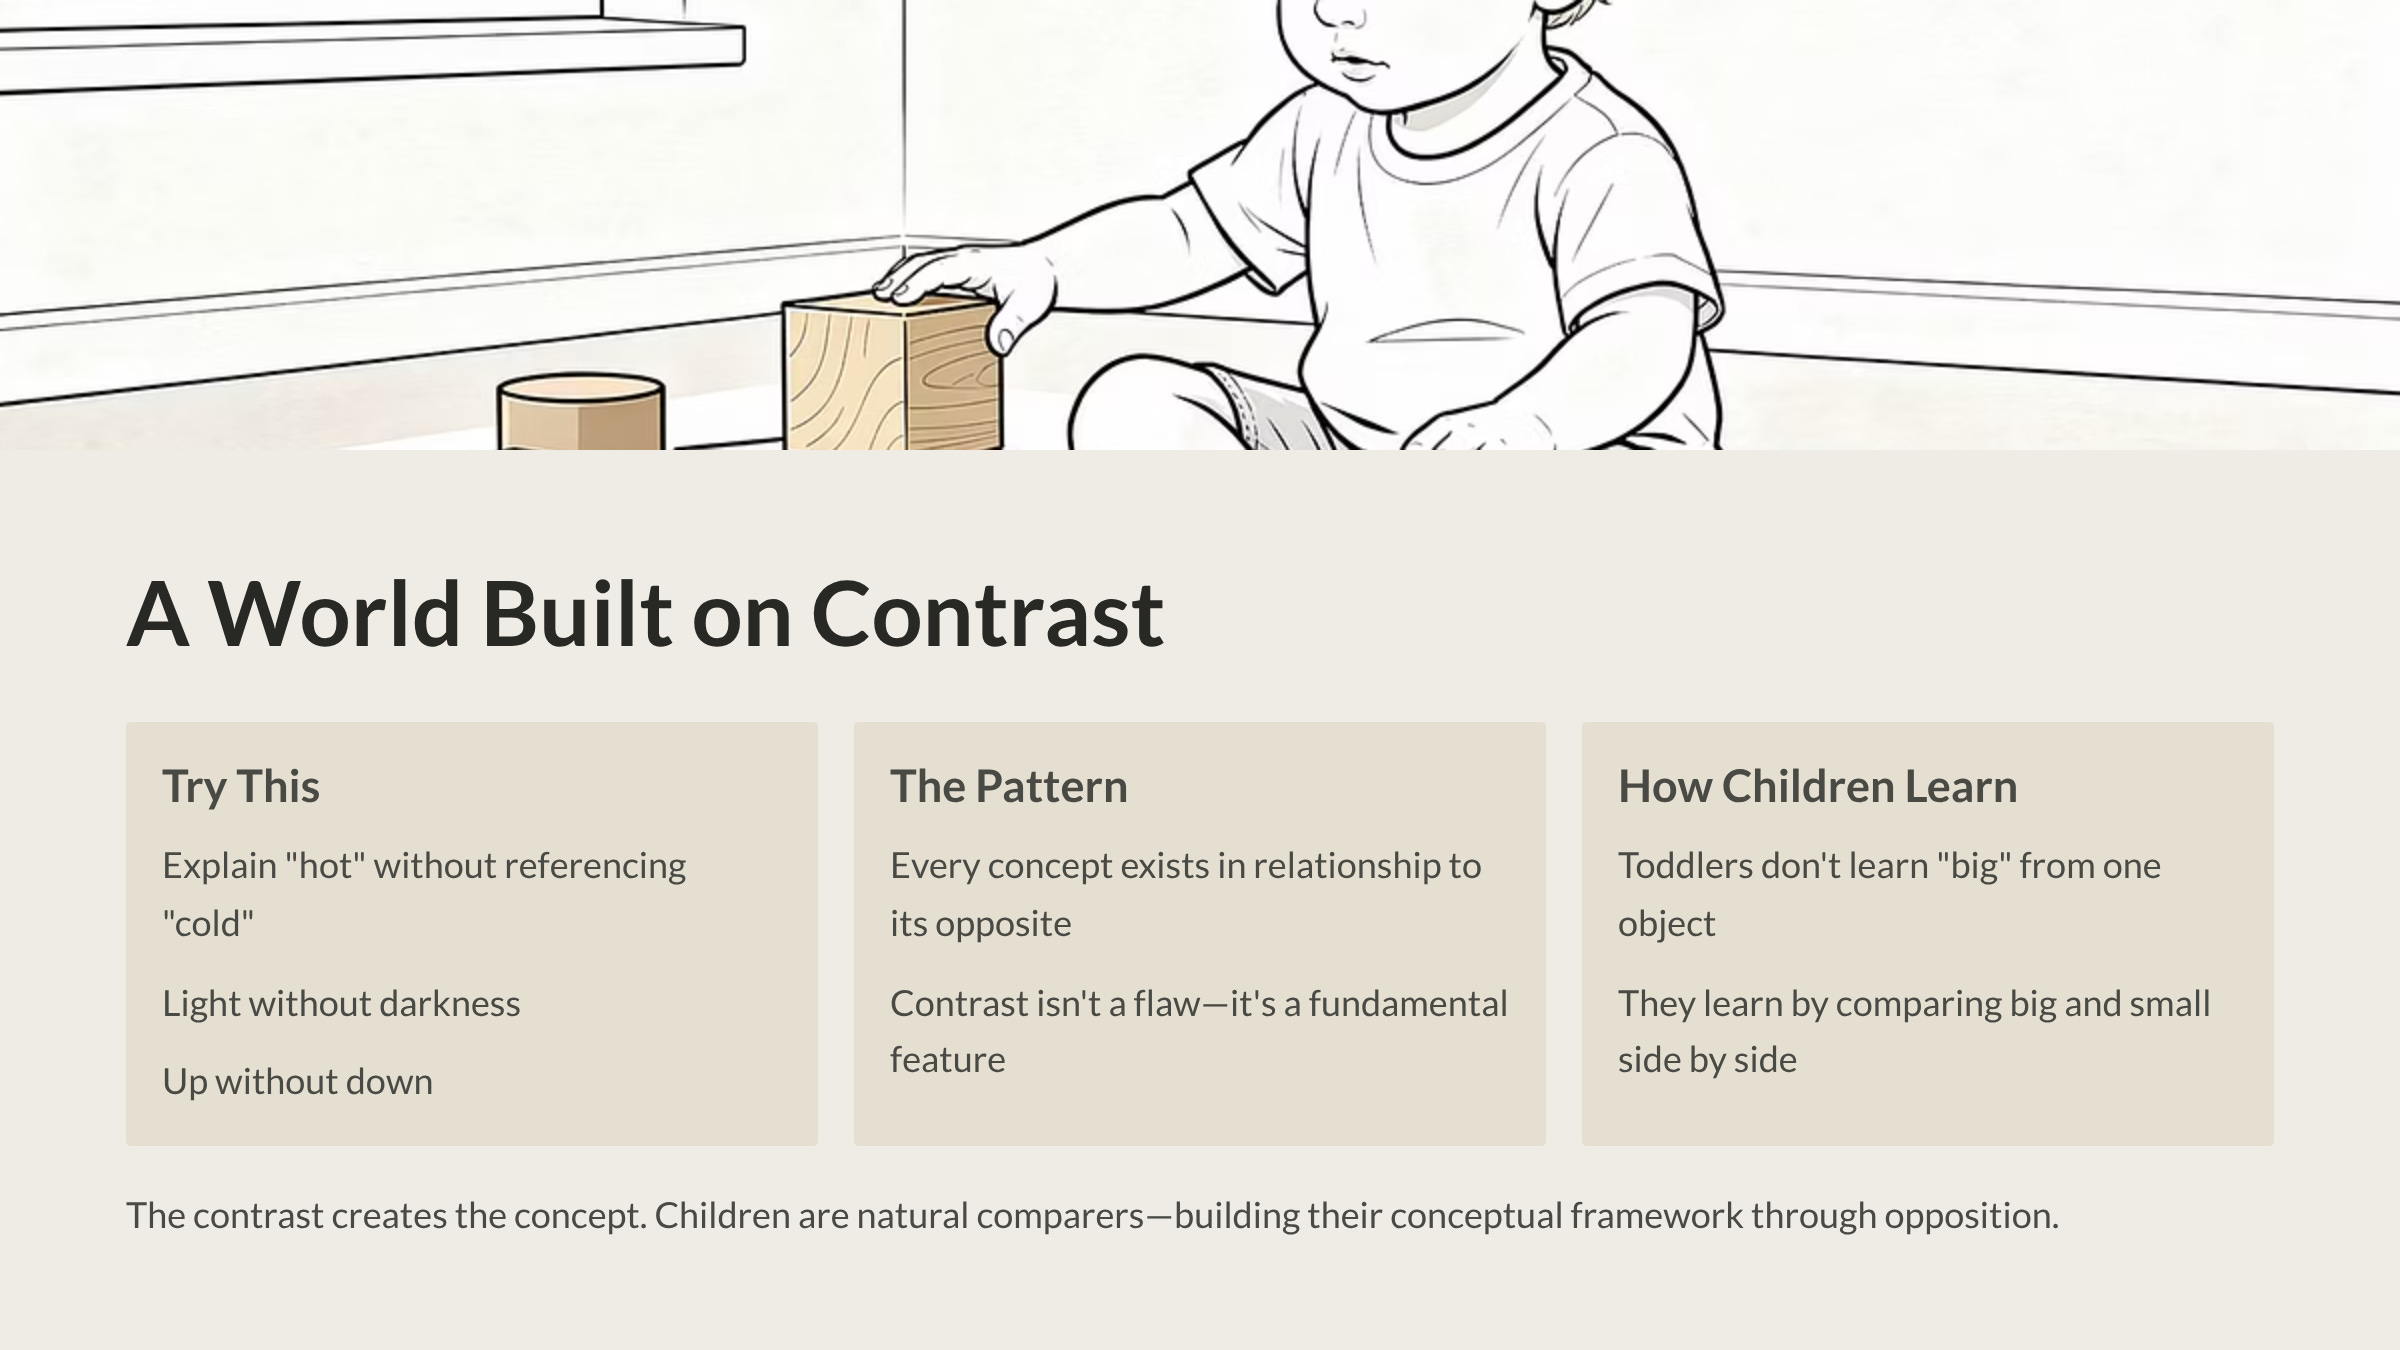
Stop for a moment and try to explain “hot” without referencing “cold.”
You can’t, can you?
You might say “elevated temperature,” but what’s elevated? Higher than what? You’re still referencing the opposite end of the spectrum.
Try explaining:
- Light without darkness
- Up without down
- Loud without quiet
- Rough without smooth
- Fast without slow
Every concept exists in relationship to its opposite.
Froebel observed that we live in a world defined by contrasts: black and white, great and small, movement and rest, even good and evil. He argued that each concept can only be truly recognized by its opposite.
This polarity isn’t a flaw in how reality is structured. It’s a fundamental feature—what Froebel called a “continuous basic structure” running through all of existence.
Why Children Need Opposites
Your toddler doesn’t learn “big” from a single object. They learn it from comparing big and small things side by side.
They don’t learn “soft” from touching one blanket. They learn it from touching the soft blanket, then the hard floor, then the soft blanket again.
The contrast creates the concept.
This is why young children are natural comparers. “This one is bigger!” “Mine is faster!” “That’s the loudest!” They’re not being competitive (well, not always). They’re building their conceptual framework of reality through contrast.
Froebel recognized this instinct and built an entire educational system around it.
The Sphere and Cube: A Masterclass in Contrast
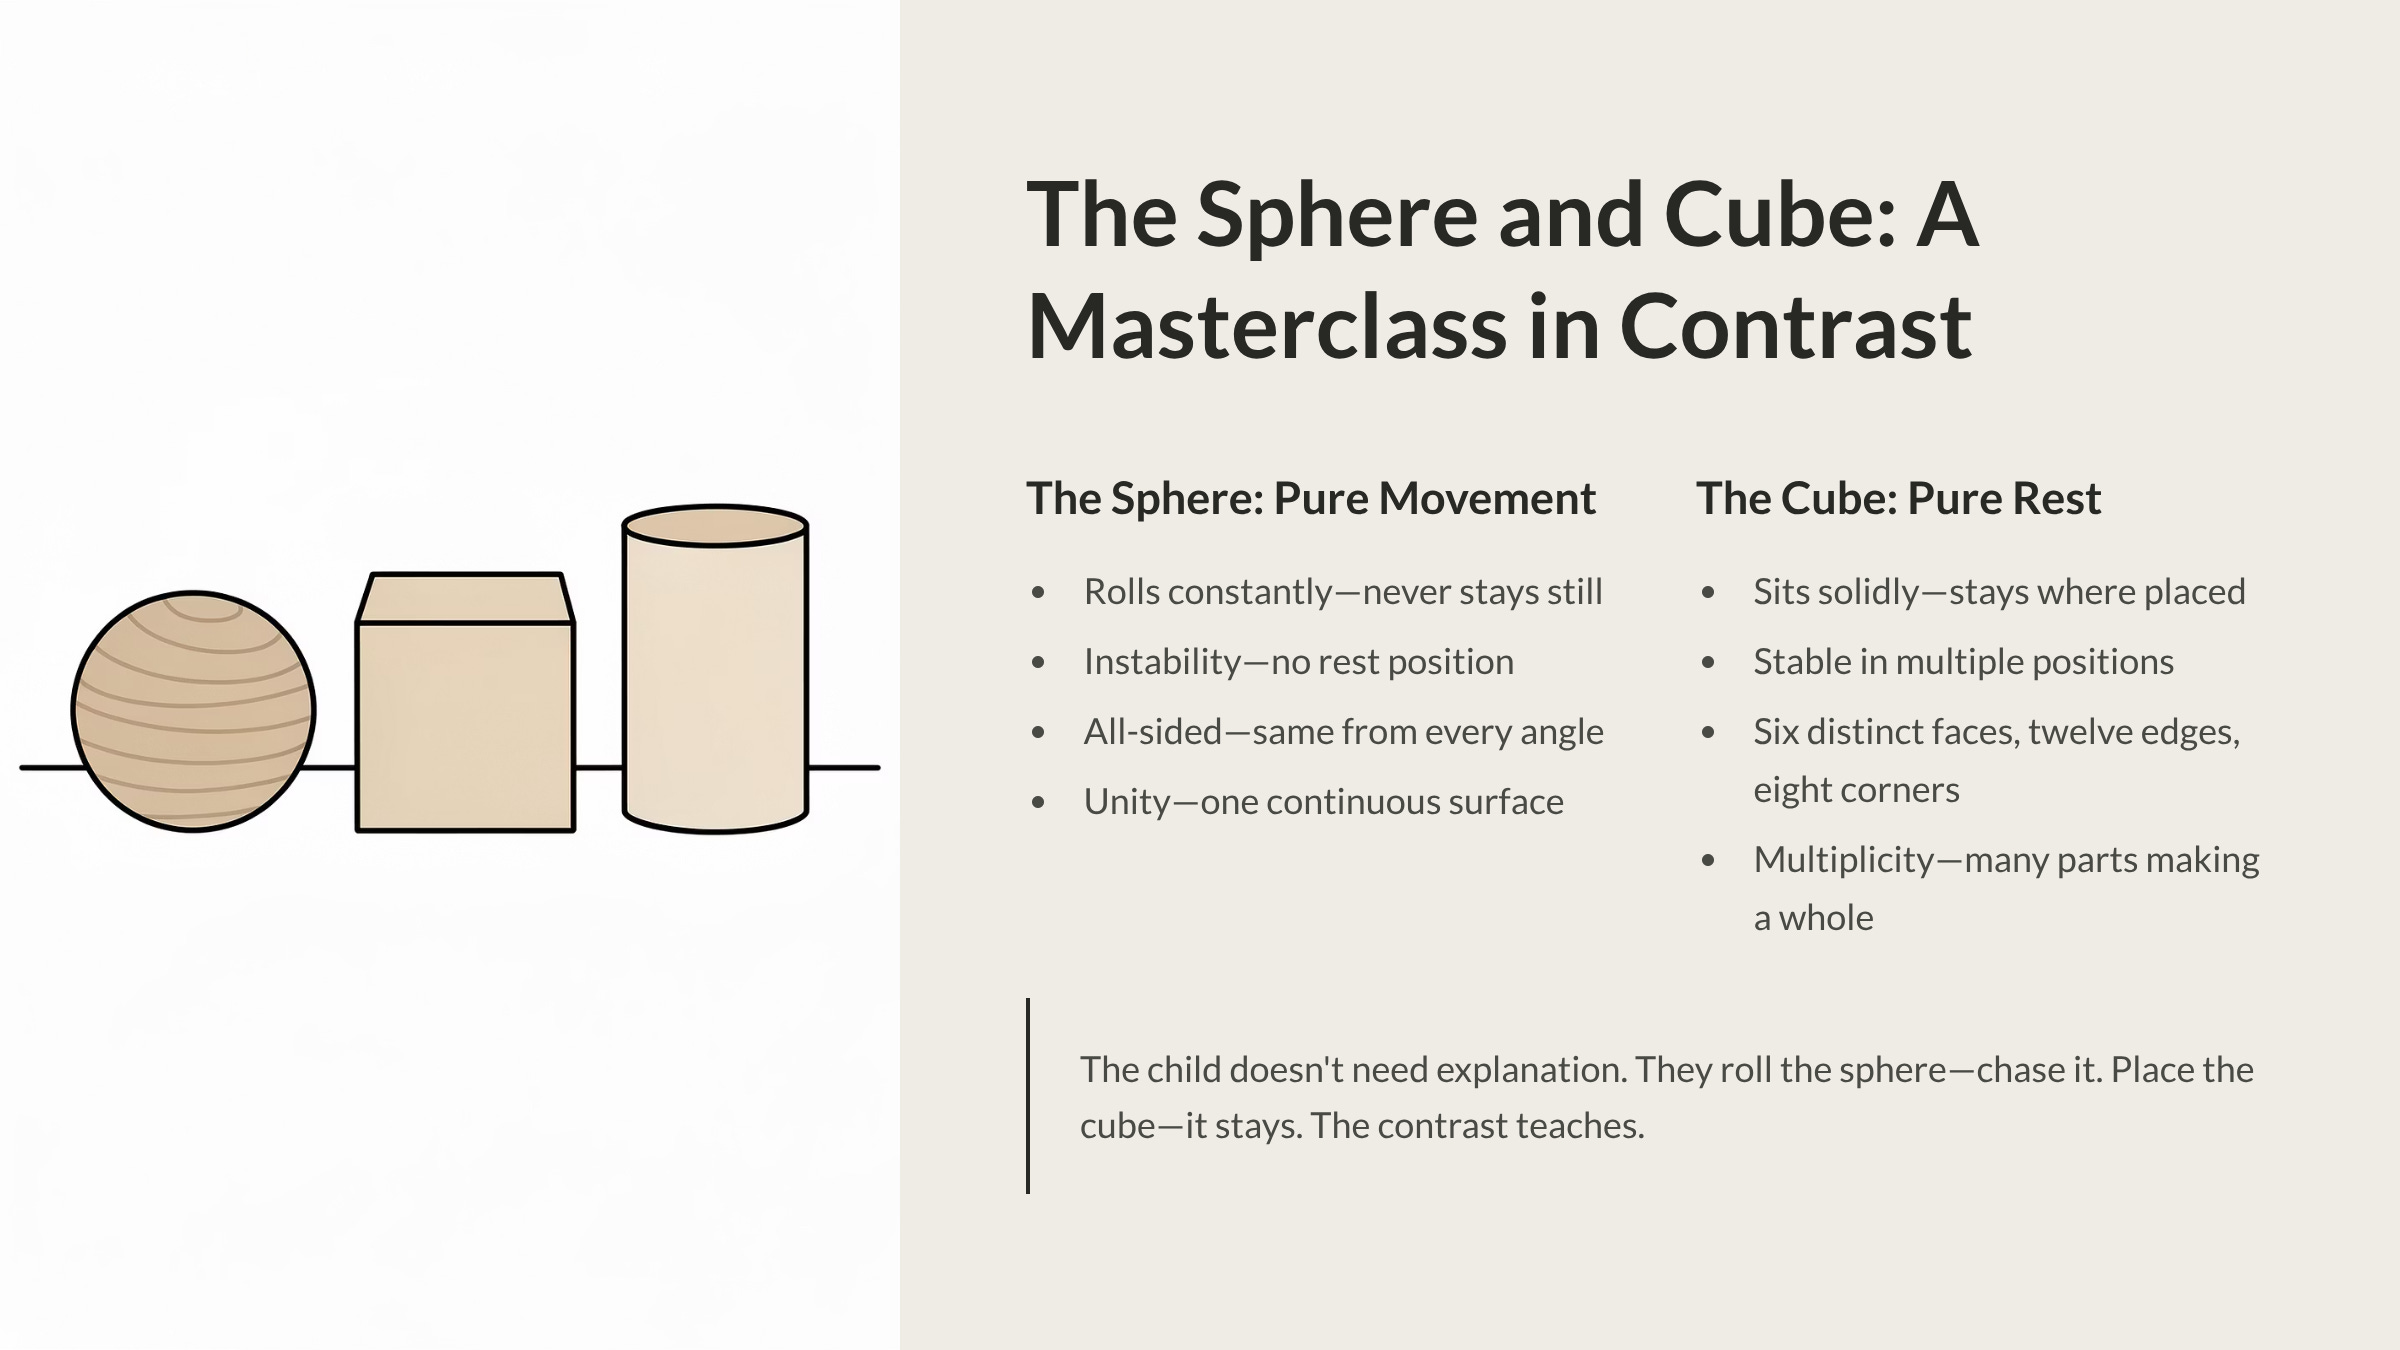
Froebel’s Second Gift is the perfect physical embodiment of the Law of Opposites.
It contains three objects:
- A wooden sphere (ball)
- A wooden cube
- A wooden cylinder
Let’s start with the two extremes.
The Sphere: Pure Movement
Hand a wooden ball to a two-year-old. What happens?
It rolls away. Constantly. The tiniest push, the slightest tilt of the surface, and it’s gone. You spend half the time chasing it.
This isn’t a design flaw. It’s the point.
The sphere represents:
- Movement (it never stays still unless perfectly balanced)
- Instability (no rest position)
- All-sidedness (looks the same from every angle)
- Smoothness (no edges, corners, or faces)
- Unity (one continuous surface)
Froebel used the term “all-sided” because no matter how you turn a sphere, it presents the same curved surface. There’s no “this side” or “that side.” It’s whole, unified, undifferentiated.
The Cube: Pure Rest
Now hand that same child a wooden cube.
It sits. Solidly. Doesn’t roll away. Stays exactly where placed (unless deliberately moved).
The contrast is immediate and physical.
The cube represents:
- Rest (stable in multiple positions)
- Solidity (firm, grounded, fixed)
- Particular-sidedness (six distinct faces, twelve edges, eight corners)
- Angles (everything is 90 degrees)
- Multiplicity (many distinct parts making a whole)
The cube has “particular sides”—six faces that look different depending on how you orient it. This face. That edge. This corner. It has differentiation, parts, structure.
The Child’s Discovery
When you give a young child both objects, something fascinating happens.
They don’t need you to explain anything.
They roll the sphere. Chase it. Roll it again.
They place the cube. It stays. They try to roll it. It tips awkwardly, clunks over its edge, settles on another face.
They pick up the sphere again. Smooth, always moving, impossible to keep still.
Back to the cube. Solid, static, deliberately stackable.
The contrast teaches.
Within minutes—often without a single word from you—the child understands something fundamental about two opposite types of forms in the world.
The Deeper Lesson: Reality Versus Appearance
Here’s where it gets really interesting.
Spin the sphere. What do you see?
It looks exactly the same. A sphere spinning looks like a stationary sphere. The form doesn’t appear to change.
Now spin the cube from different points:
- Spin it on a face: you see faces appearing and disappearing
- Spin it on an edge: you see a completely different pattern
- Spin it on a corner: you see yet another appearance
The sphere remains visibly constant. The cube appears to change shape depending on how you interact with it.
But—and this is crucial—the cube hasn’t actually changed. Only its appearance from your perspective has changed.
This teaches the difference between reality and appearance.
The child learns that how something looks depends on your relationship to it. That the same object can present different faces. That reality is more stable than appearances.
That’s pretty sophisticated philosophy for a three-year-old to absorb through their hands.
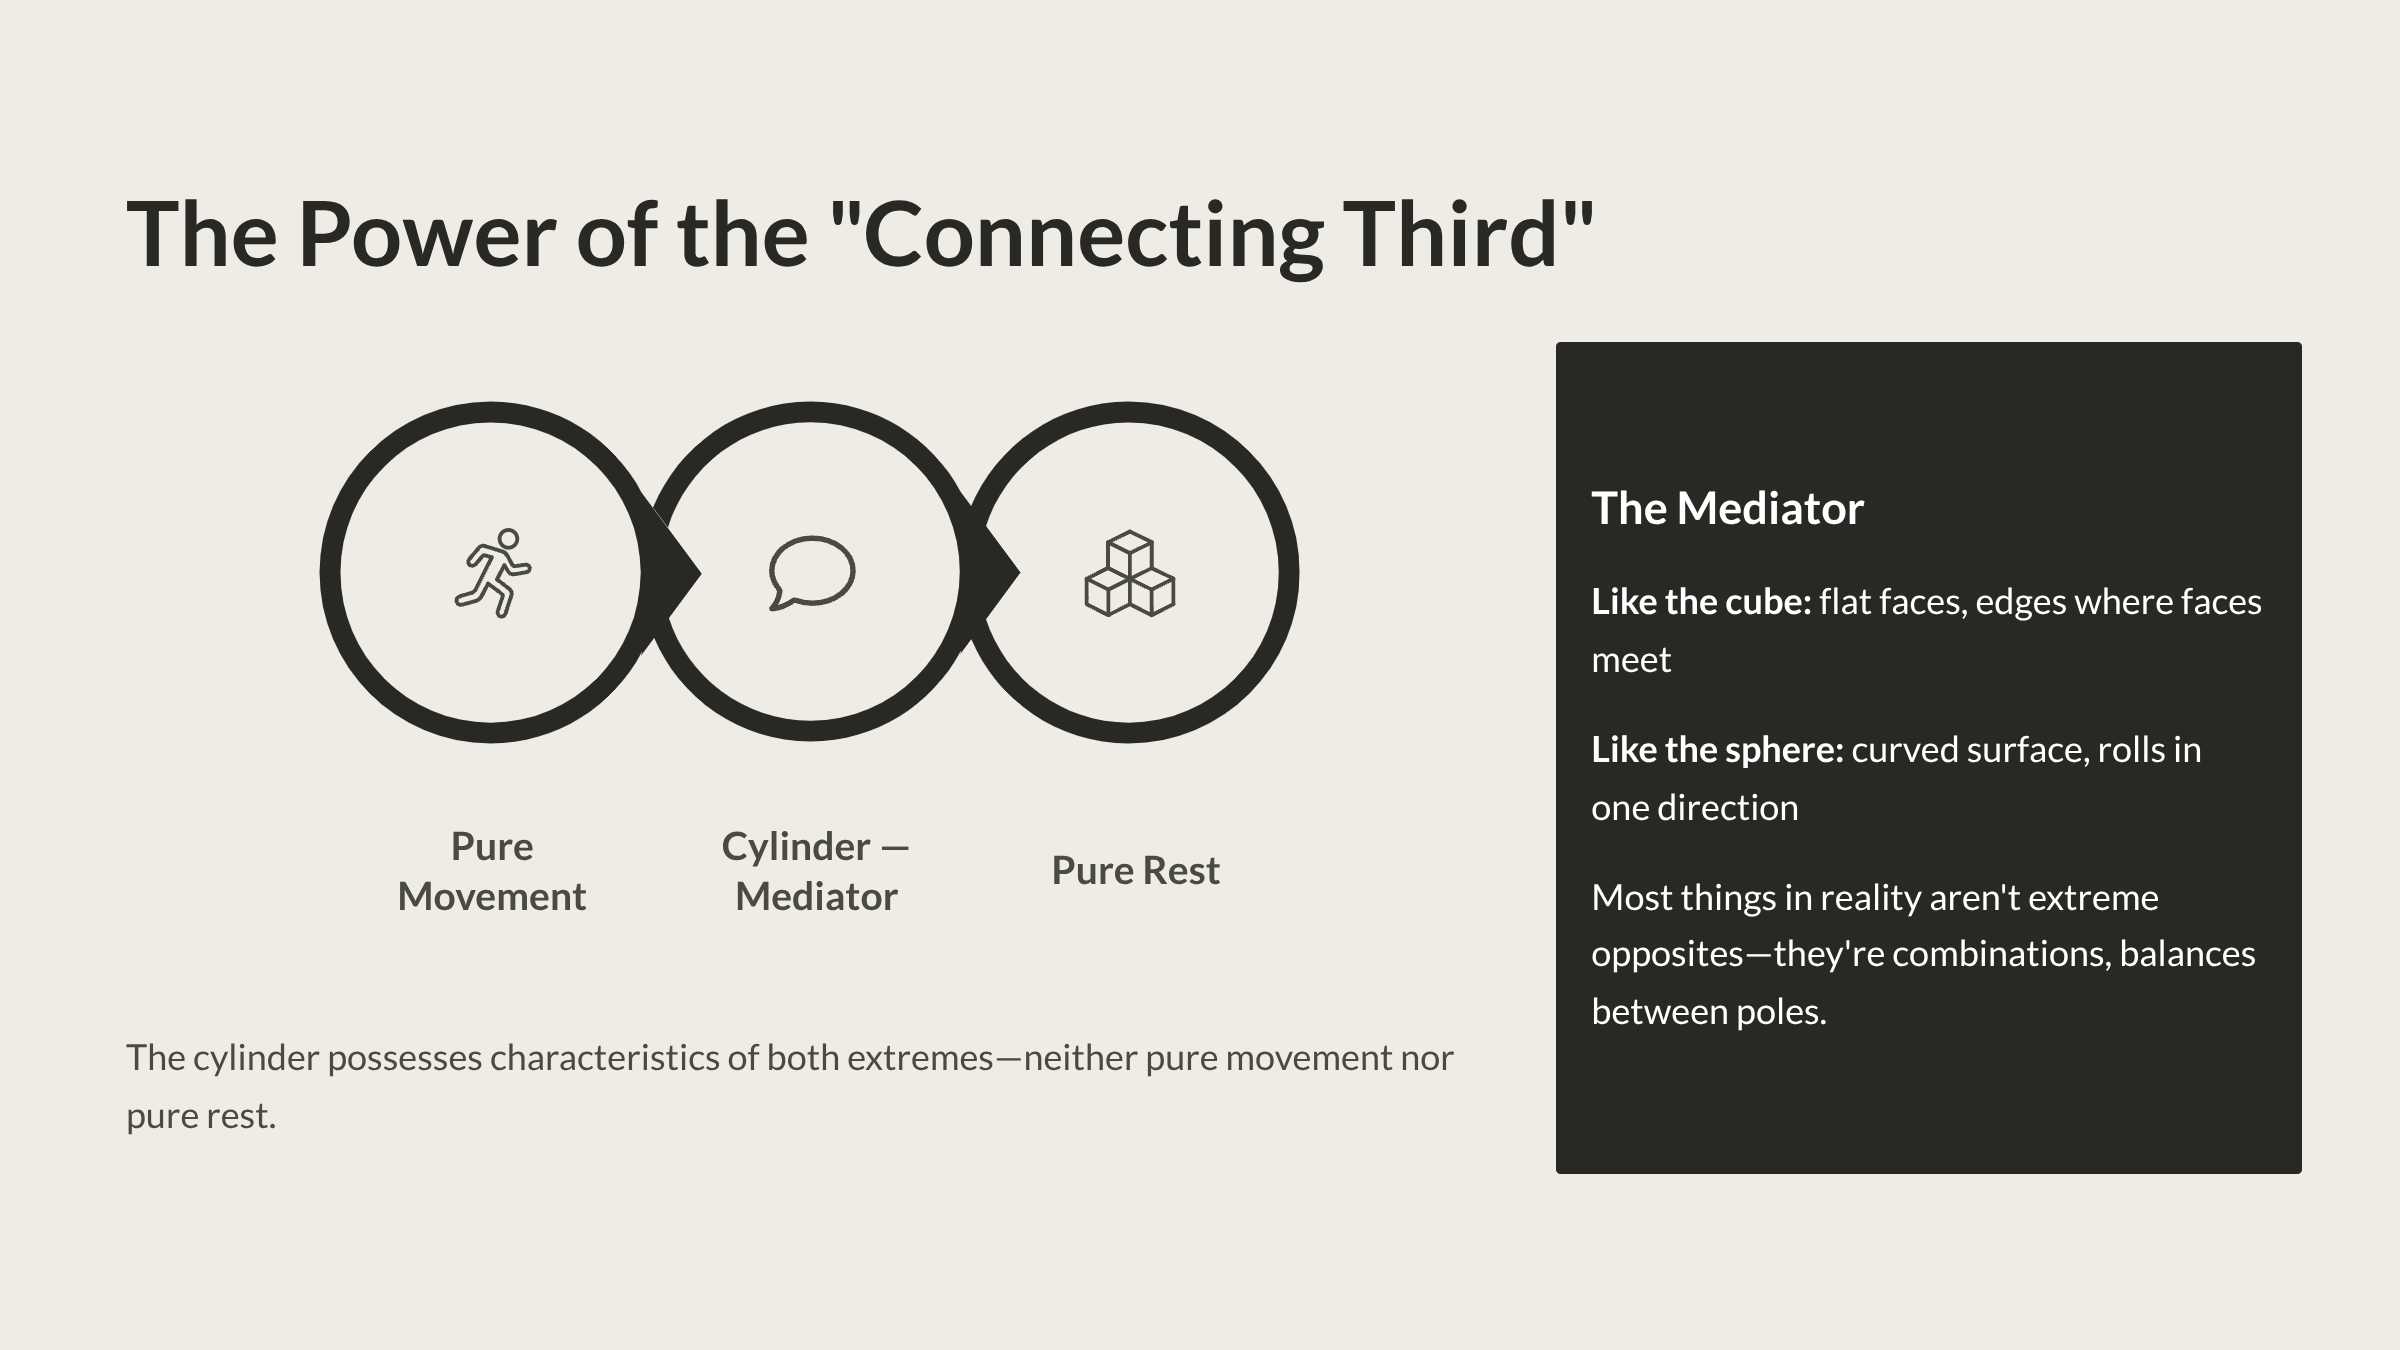
The Power of the “Connecting Third”
If Froebel had stopped with sphere and cube, he’d have taught about opposites.
But he added something crucial: the cylinder.
The Mediator
The cylinder possesses characteristics of both extremes:
- Like the cube: flat faces (top and bottom), edges where faces meet
- Like the sphere: curved surface, ability to roll (though only in one direction)
It’s neither pure movement nor pure rest. Neither all-sided nor particular-sided.
It’s the mediator between extremes.
When you place all three objects before a child, they discover something profound: most things in reality aren’t extreme opposites. They’re combinations, mediations, balances between poles.
The cylinder teaches that diversity isn’t fragmentation. Different forms aren’t in conflict. They’re all parts of what Froebel called “Great Unity”—variations within an underlying wholeness.
What This Looks Like in Practice
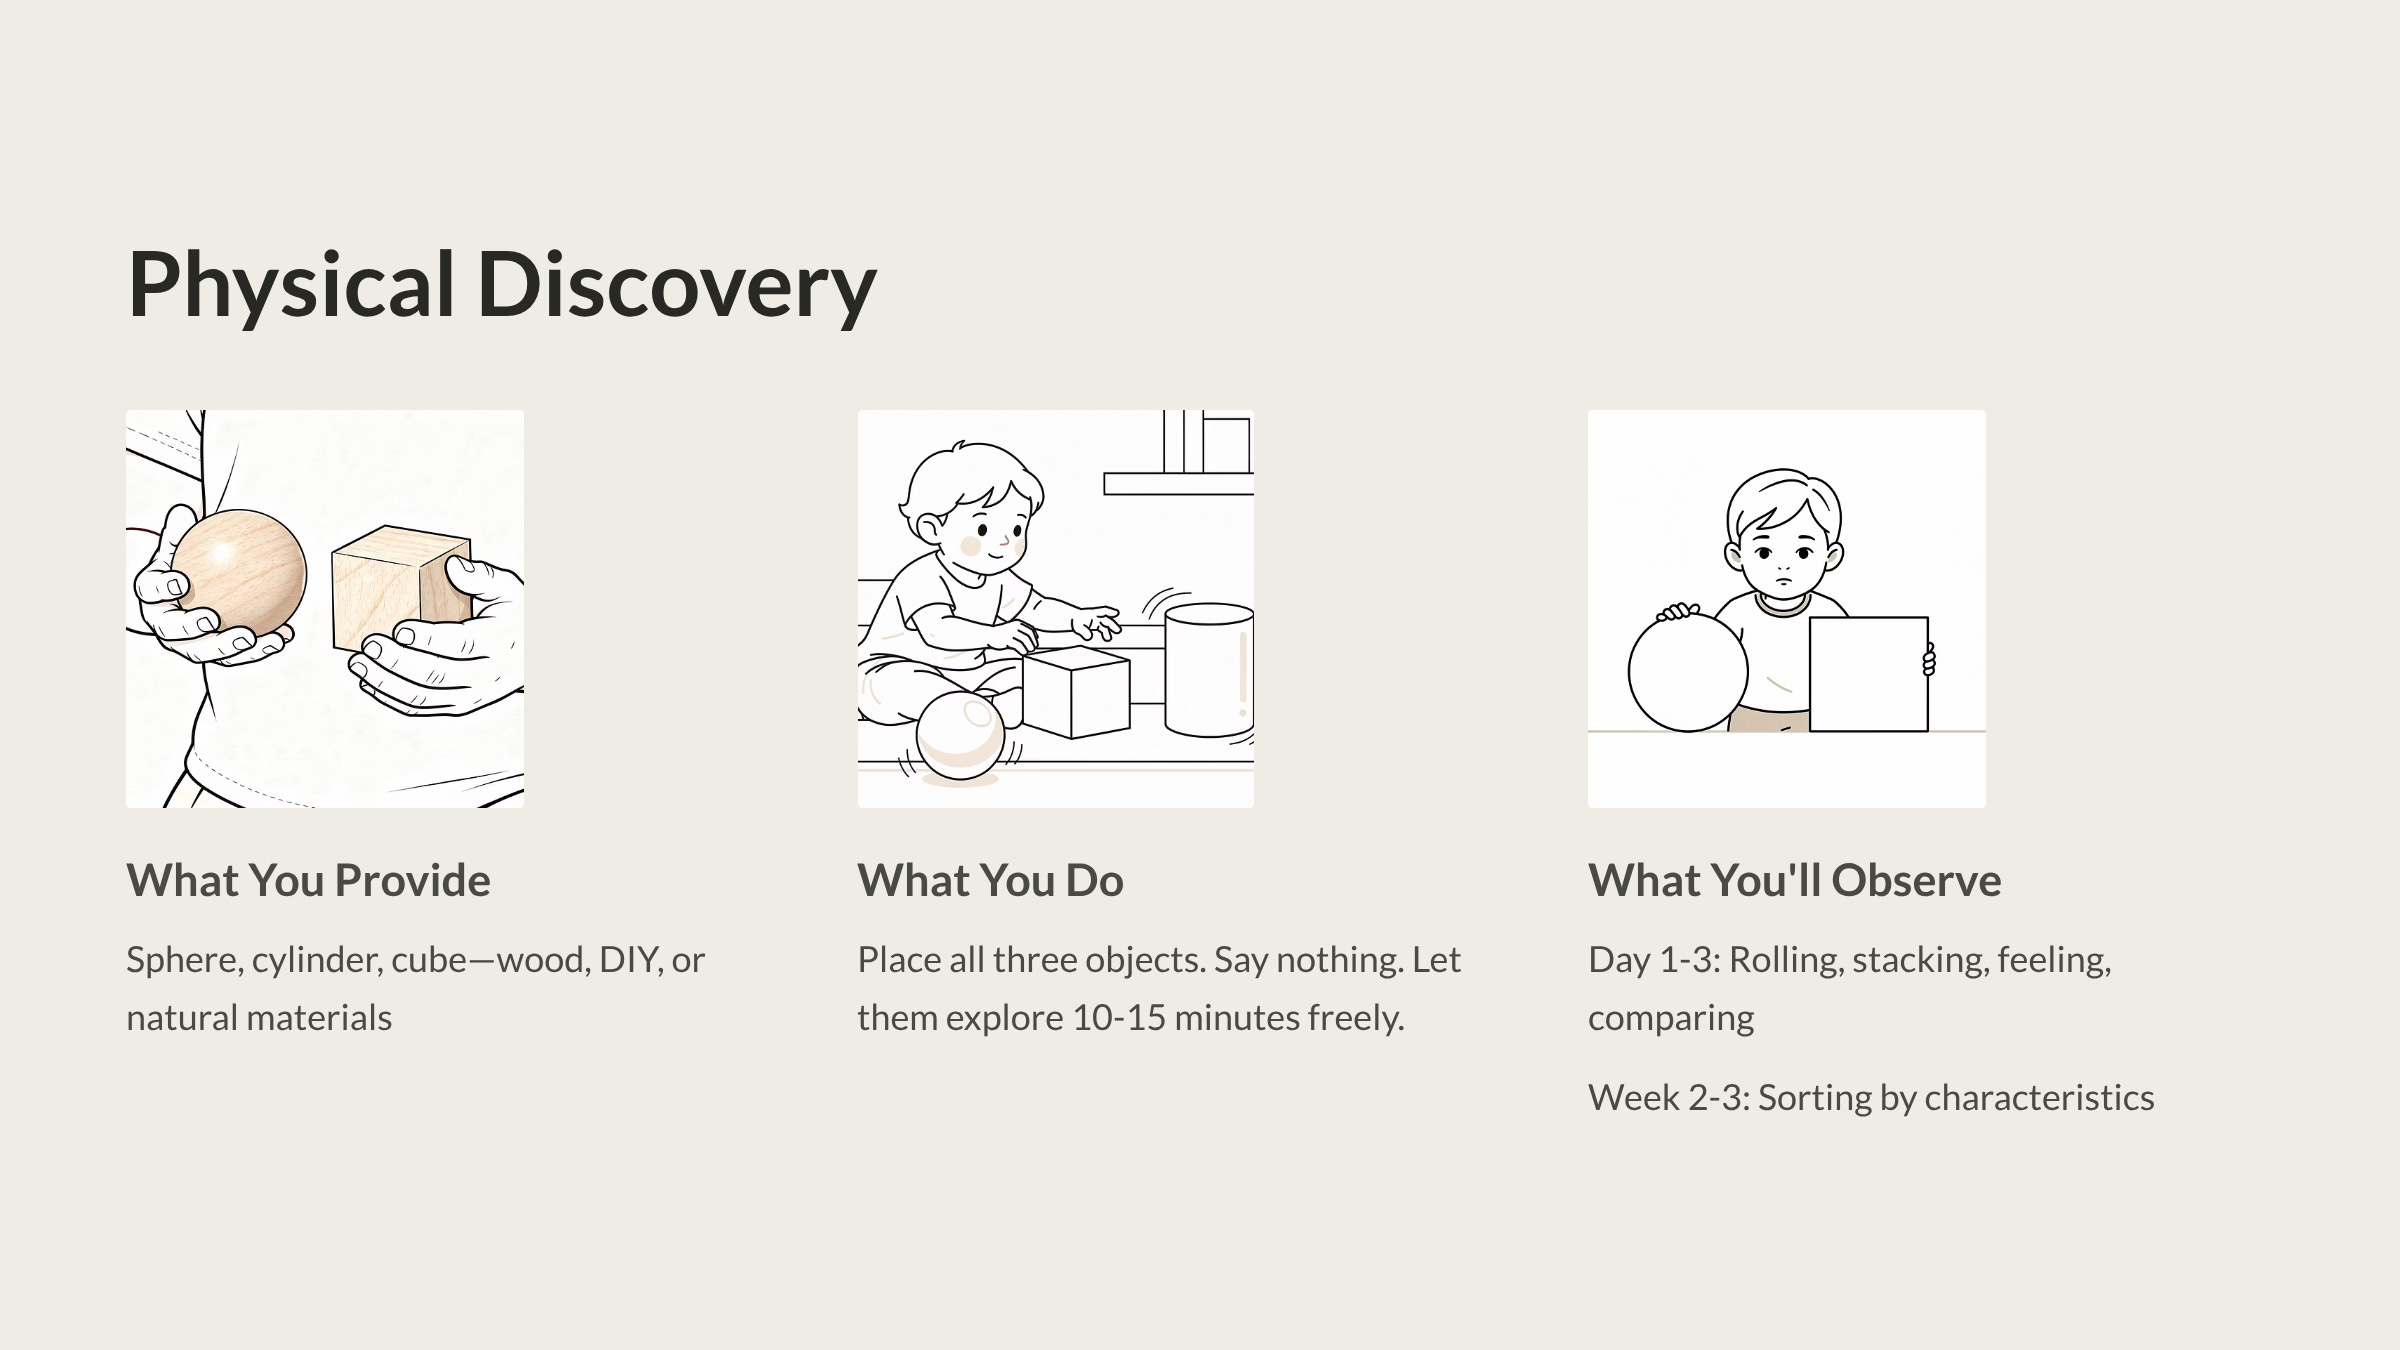
Ages 2-4: Physical Discovery
What you provide: Three objects representing the sphere-cylinder-cube relationship. This could be:
- Froebel’s Second Gift (sphere, cylinder, cube in wood)
- Spielgaben Gift 2 (same concept, modern production)
- DIY version: tennis ball, toilet paper tube sealed at both ends, wooden block
- Natural version: round stone, thick stick, chunk of wood or brick
What you do: Place all three in front of your child. Say nothing at first. Let them handle, roll, stack, compare.
After they’ve explored freely (minimum 10-15 minutes), you can introduce language:
- “This one rolls fast. This one sits still. This one does both.”
- “All smooth. All edges. Smooth and edges.”
- “Can you make them race? Which one wins?”
What you’ll observe:
- Day 1-3: Exploration through rolling, stacking, feeling, comparing
- Day 4-7: Intentional testing (trying to make the cube roll, seeing if the sphere will stack)
- Week 2-3: Sorting behaviors (grouping by characteristics)
- Week 4+: Using the objects for building, incorporating understanding into play
Real example: Your three-year-old rolls the sphere, chases it, rolls it again. Tries to roll the cube—it clunks and tips. Discovers the cylinder rolls but only in one direction. Then—unprompted—lines up all three and rolls them simultaneously to see what happens. The sphere wins. The cylinder goes straight but slower. The cube tips and stops. They repeat this race seventeen times, each time confirming the pattern. They’ve just internalized fundamental geometric properties through play.
Ages 5-7: Language and Categorization
What you provide: Same three basic forms, plus:
- More examples of each type (multiple spheres, cubes, cylinders in different sizes)
- Objects from nature and home (orange = sphere, box = cube, can = cylinder)
- Drawing materials
What you do:
- Go on a “shape hunt” through your house or outdoors
- Sort objects by which category they belong to
- Introduce vocabulary: sphere, cube, cylinder (but only after physical understanding is solid)
- Have them draw each form from observation
- Ask comparison questions: “How are these two similar? How are they different?”
What you’ll observe:
- Ability to classify objects they encounter
- Recognition that most real objects combine characteristics
- Beginning to notice that some objects are “mostly sphere” or “mostly cube”
- Drawing attempts that show understanding of 3D form on 2D surface
Real example: You’re in the kitchen. Your six-year-old picks up an apple: “It’s like the ball—sphere—but it’s not perfectly round. It’s like… mostly sphere with a little flat part.” Then picks up a die: “Perfect cube. All the sides are exactly the same.” Then a marker: “Cylinder! But the tip isn’t flat—it’s pointy.” They’re applying the framework to classify reality.
Ages 8-12: Abstract Understanding and Creation
What you provide:
- Clay or playdough for forming shapes
- Building materials for creating structures using different forms
- Math concepts introduced through the lens of these forms
- Drawing/design projects incorporating geometric forms
What you do:
- Challenge them to create perfect sphere, cube, cylinder from clay
- Discuss why certain forms are used in architecture (cube for stability, cylinder for columns)
- Explore mathematics: surface area, volume, how forms relate numerically
- Connect to real-world applications: wheels (sphere/cylinder), buildings (cube), containers (cylinder)
What you’ll observe:
- Ability to abstract beyond the physical objects
- Understanding that these are ideal forms; nature approximates them
- Recognition of these patterns in architecture, nature, design
- Application to problem-solving (what shape is best for what purpose?)
Real example: Your ten-year-old is building a structure with blocks. They use cubes for the foundation: “These are stable—they won’t roll or tip.” Cylinders for columns: “These distribute weight better than flat blocks, and they’re more elegant.” A sphere as a decorative element on top: “This creates visual interest because it’s so different from everything else—it’s the opposite of the foundation.” They’re applying understanding of form to functional and aesthetic decisions.
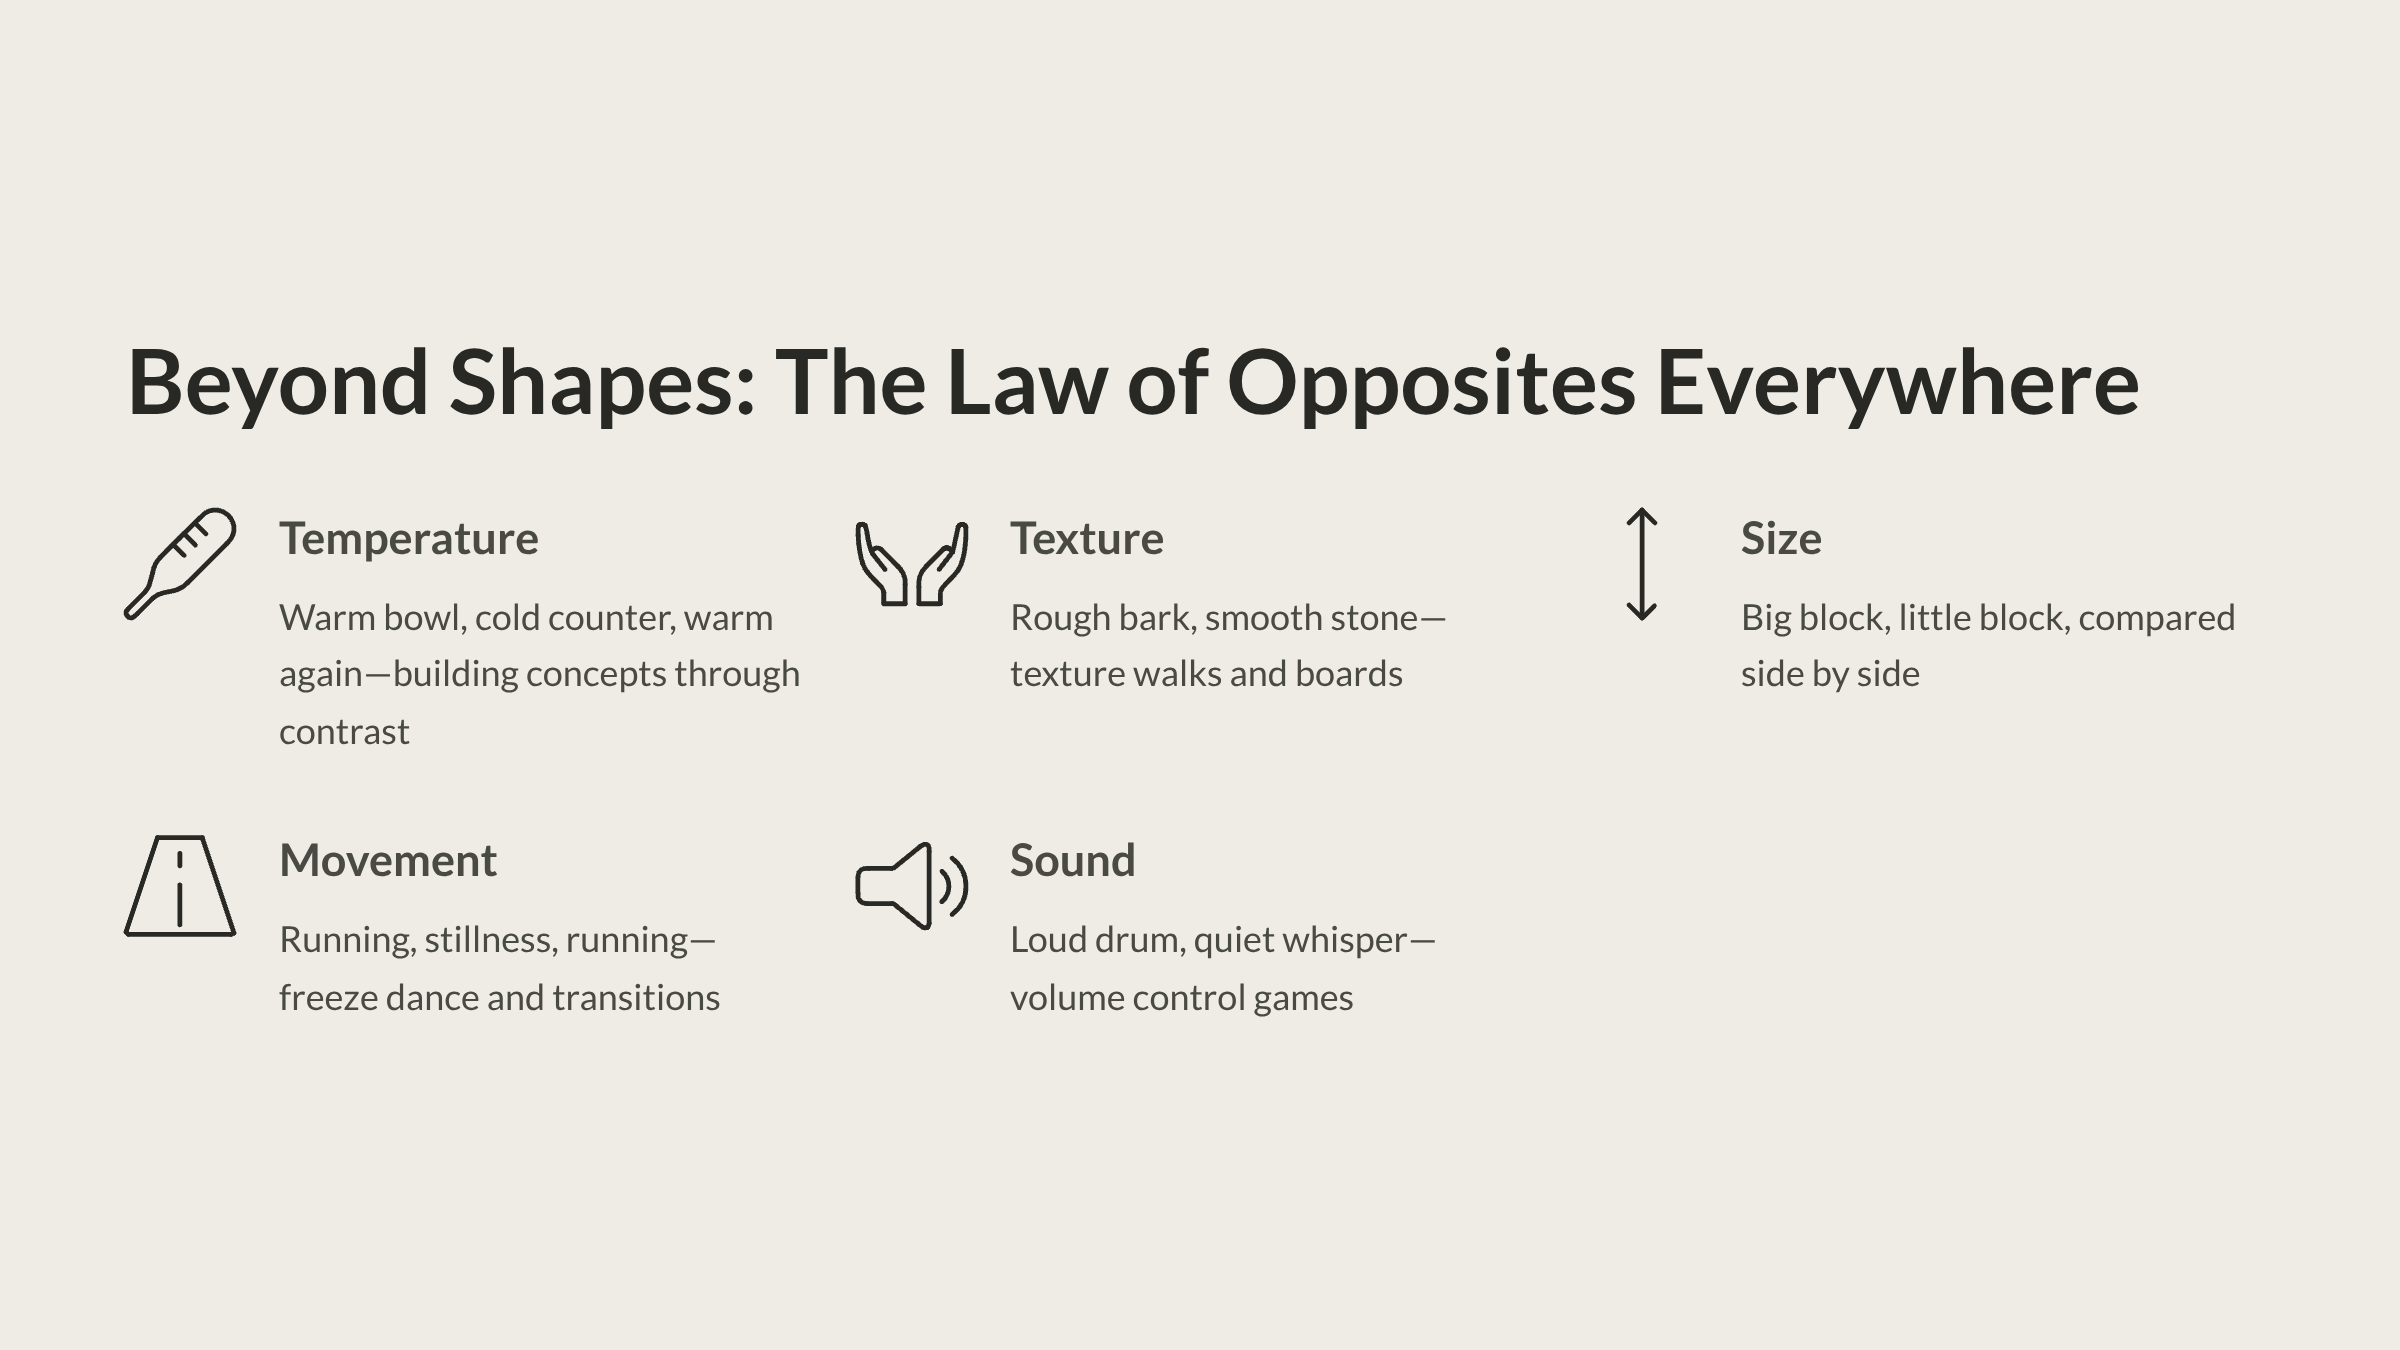
Beyond Shapes: The Law of Opposites Everywhere
Once you understand the principle, you’ll see it operating constantly in how children learn.
Temperature
Your toddler touches the warm bowl, then the cold counter, then back to the warm bowl.
They’re not being random. They’re building the concept through contrast.
You can support this:
- Provide objects at different temperatures safely (warm cloth, cool stone)
- Name the experience: “Warm… cold… warm again”
- Let them discover the middle: lukewarm water as the “connecting third”
Texture
Rough bark, smooth stone, rough bark again.
Support this:
- Create a texture board (sandpaper, velvet, corrugated cardboard)
- Go on texture walks (find the roughest thing, find the smoothest thing)
- Notice materials that are both (slightly rough fabric as the mediator)
Size
Big block, little block, compared directly side by side.
Support this:
- Provide objects in graduated sizes (nesting cups, stacking rings, blocks)
- Use comparison language: “Bigger than… smaller than…”
- Find the middle: medium-sized objects between extremes
Movement and Rest
Running, then stillness, then running again.
Support this:
- Games that alternate (freeze dance, red light/green light)
- Observe nature (wind blowing, then calm, then wind again)
- Notice the transition: slowing down as the mediator between fast and stopped
Sound
Loud drum, quiet whisper, loud drum again.
Support this:
- Musical instruments with volume control
- Games with volume changes (loud voice, whisper, medium voice)
- Observe environmental sounds (traffic versus quiet room)
The pattern is always the same:
- Experience the first extreme
- Experience the opposite extreme
- Compare them (this is when understanding forms)
- Find the mediator (things that are “sort of both”)
- Apply the framework to new examples
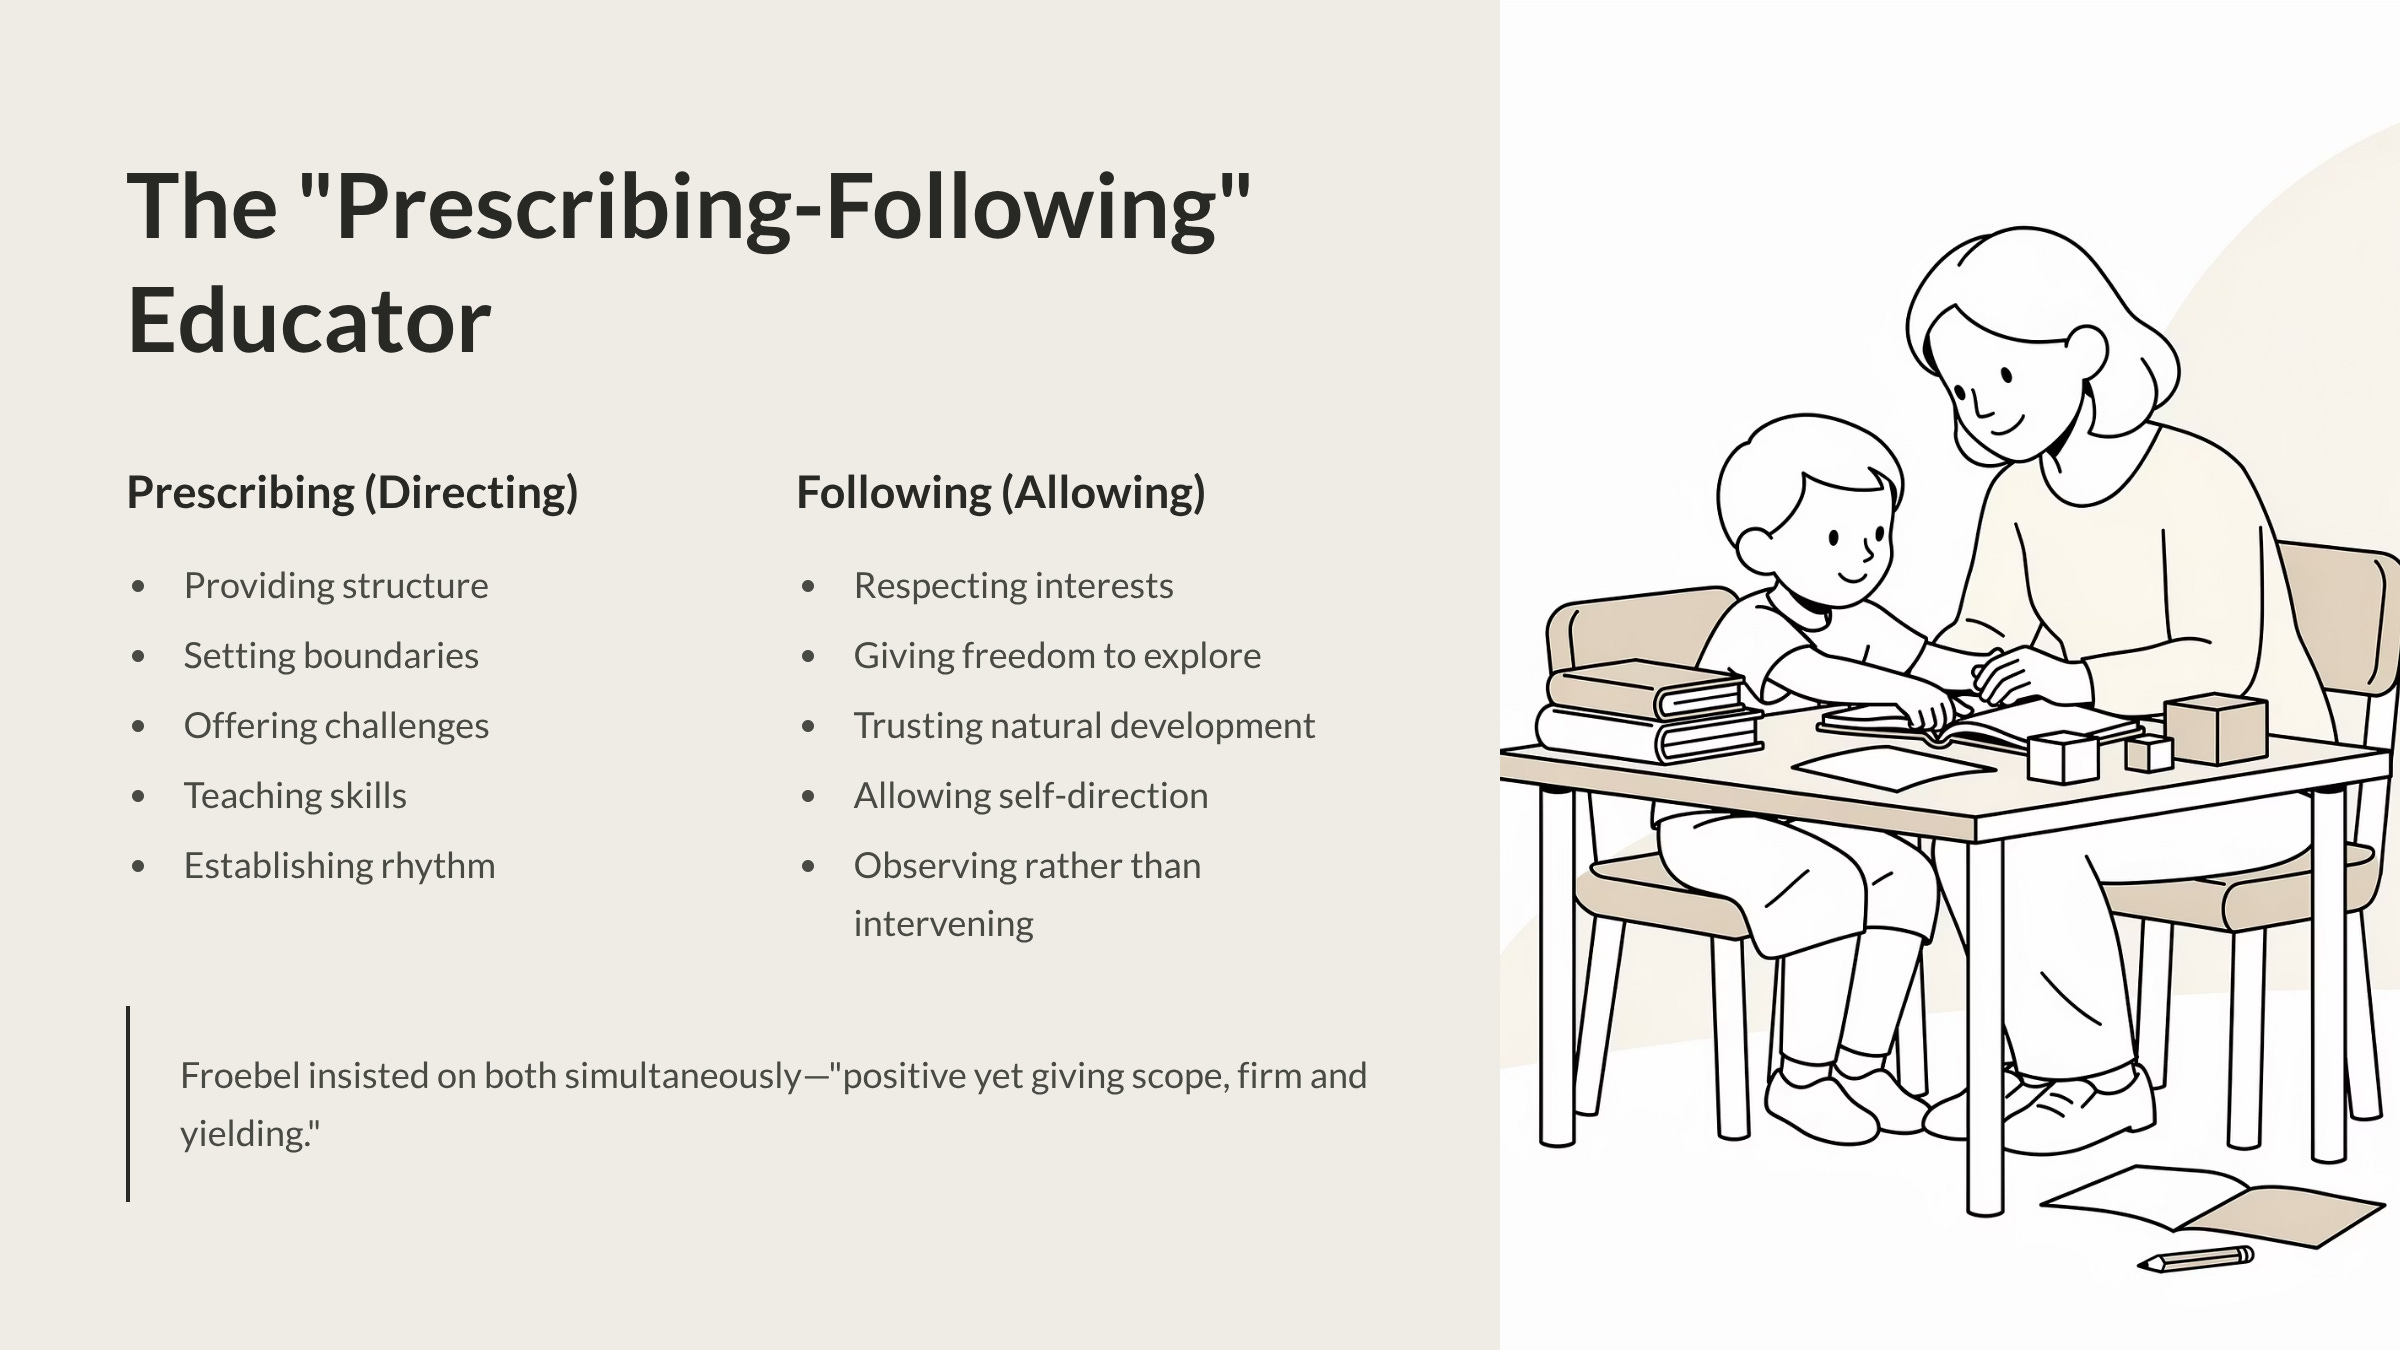
The “Prescribing-Following” Educator
Here’s where the Law of Opposites becomes deeply practical for how you approach homeschooling.
Froebel observed that education itself operates between two poles:
Prescribing (Directing):
- Providing structure
- Setting boundaries
- Offering challenges
- Giving guidance
- Teaching skills
- Establishing rhythm
Following (Allowing):
- Respecting the child’s interests
- Giving freedom to explore
- Trusting natural development
- Allowing self-direction
- Observing rather than intervening
- Letting things unfold
Most educational philosophies choose a side:
- Traditional education: heavy on prescribing, light on following
- Unschooling: heavy on following, light on prescribing
Froebel insisted on both simultaneously.
He described the true educator as someone who must be “positive yet giving scope, firm and yielding”—a living embodiment of the Law of Opposites.
The Balancing Act
This is harder than it sounds.
Too much prescribing:
- The child becomes passive, waiting for instruction
- Natural curiosity gets suppressed
- Learning becomes about compliance rather than discovery
- You’re always “teaching at” rather than “learning with”
Too much following:
- The child lacks structure needed for deep development
- Skills that require guidance never get transmitted
- Natural laziness (we all have it) goes unchallenged
- You’re abdicating the role of educator
The balance looks like:
You prescribe:
- Time (we do math in the morning)
- Materials (these are available today)
- Boundaries (we treat materials respectfully)
- Challenges (try building something taller than yesterday)
- Skills (here’s how to hold the pencil effectively)
You follow:
- Interest (you’re fascinated by bridges? Let’s explore that)
- Pace (you need three weeks with these blocks? Take three weeks)
- Method (you prefer drawing your plans before building? Do that)
- Expression (you want to make patterns instead of structures? Perfect)
- Process (you’re approaching this differently than I would? Show me your way)
The mediating “third”: You act as a “play leader”—someone who provides the garden (structure, materials, protection) but allows the plants (children) to grow according to their own nature.
What This Looks Like Day-to-Day
Morning Math Time (Prescribing): “It’s 9am. Math time. Here are your pattern blocks.”
Child’s Choice Within Structure (Following): “I want to make a rocket today instead of patterns.”
Your Response (Mediating): “Great. Show me how you’ll use mathematical thinking in your rocket design. What shapes will you need? How will you make it symmetrical?”
You held the boundary (math time happens) while following their interest (rockets instead of abstract patterns) and connected it back to the learning goal (mathematical thinking through design).
Another Example:
You Prescribe (Structure): “We’re doing a nature walk this morning.”
Child Resists (Opposition): “I don’t want to walk. I want to stay inside and build.”
You Follow (Flexibility): “What if we collect sticks and interesting objects on a short walk, then build with them inside?”
You Prescribe (Boundary): “We’ll walk for 20 minutes, then build for as long as you want.”
You maintained the goal (getting outside, experiencing nature) while adapting to their interest (building) and finding the mediating solution (collecting natural materials for indoor building).
Implementing the Law of Opposites This Week
Here’s how to start using this principle immediately.
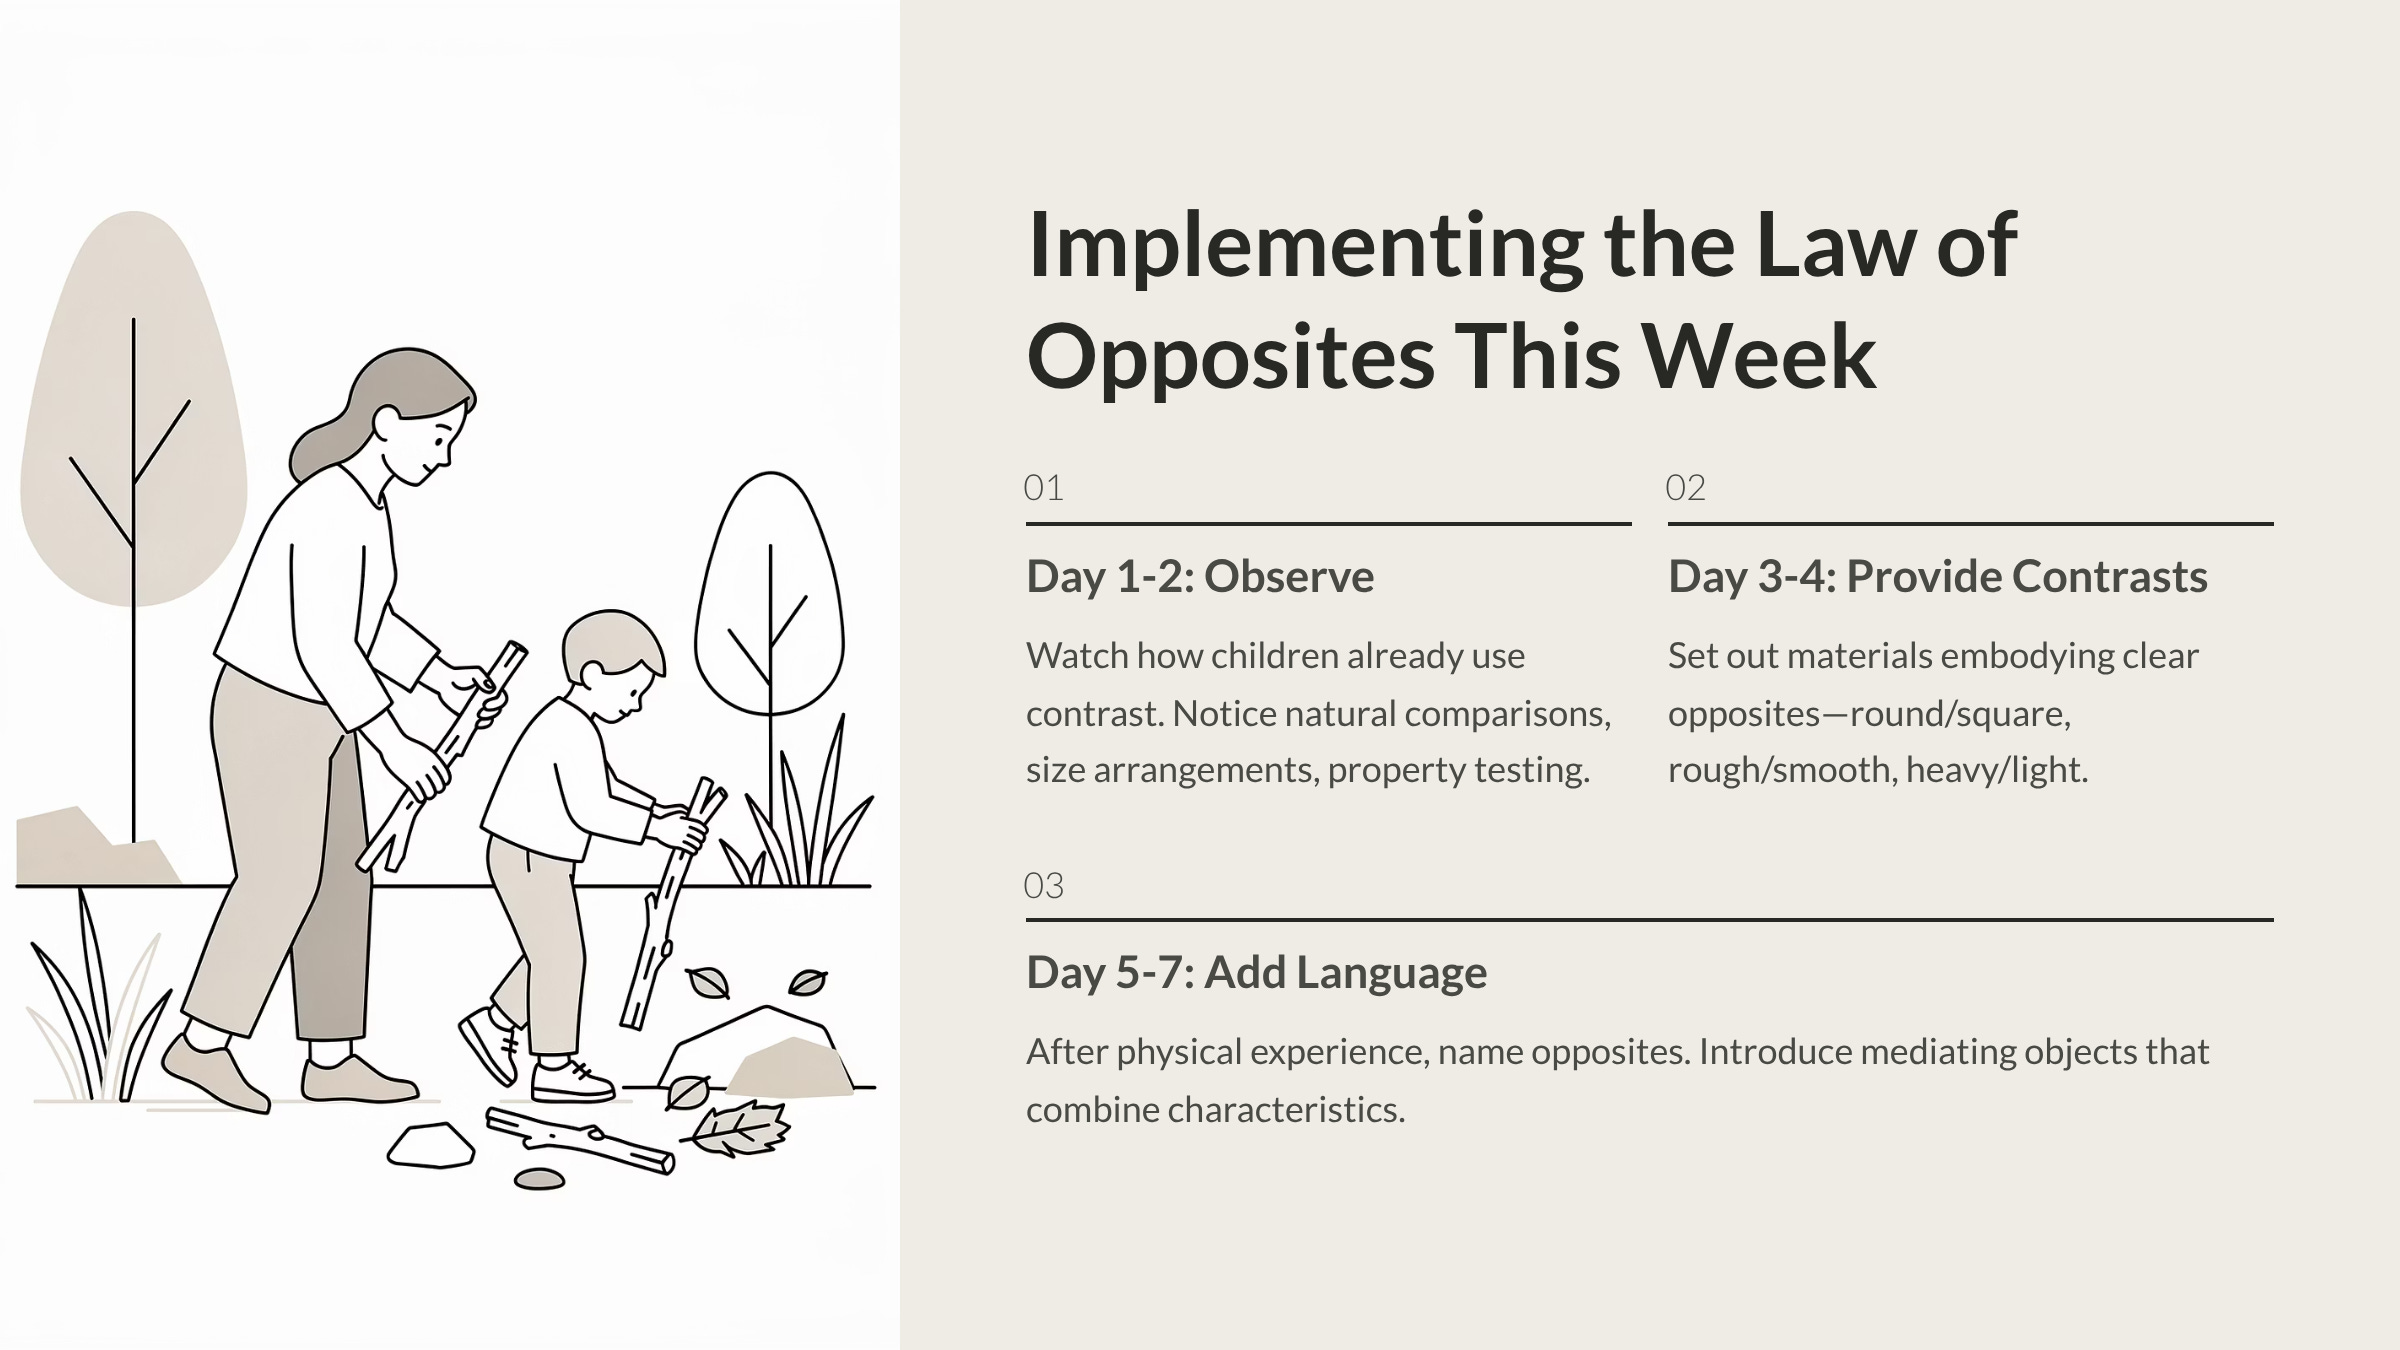
Day 1-2: Observe Current Comparisons
Your task: Watch how your children already use contrast to understand the world.
Notice:
- What opposites do they naturally compare?
- When do they line things up to compare size?
- When do they test contrasting properties (hot/cold, rough/smooth)?
- What language do they use? (”This is bigger!” “That’s the fastest!”)
Example observation: “Emma spent 15 minutes arranging rocks by size, constantly comparing: ‘This one’s bigger than that one, but smaller than this one.’ She’s naturally using the Law of Opposites to build understanding of relative size.”
Day 3-4: Provide Intentional Contrasts
Your task: Set out materials that embody clear opposites.
For ages 2-5:
- Round and square objects
- Rough and smooth textured items
- Heavy and light objects (same size if possible)
- Big and small versions of the same thing
For ages 6-8:
- Graduated sizes (small, medium, large, extra large)
- Temperature contrasts (safely—warm and cool water in bowls)
- Sound contrasts (loud and soft instruments)
- Movement games (fast and slow, high and low)
For ages 9-12:
- Abstract opposites (simple and complex patterns)
- Opposing concepts (order and chaos in arrangements)
- Contrasting methods (precise measurement versus estimation)
- Scientific opposites (acids and bases, dense and light materials)
What to avoid: Don’t explain it verbally first. Let them discover through handling, testing, comparing.
Day 5-7: Introduce Language and Mediators
Your task: After they’ve physically experienced contrasts, add:
Language:
- Name the opposites: “Round… square”
- Compare: “How are these different?”
- Connect: “What’s the same about them?”
Mediators:
- Provide objects that combine characteristics
- For sphere/cube: add cylinders, eggs, rounded boxes
- For rough/smooth: add slightly textured items
- For big/small: add medium-sized items
Discussion questions:
- “Which is more like this one?”
- “Can you find something that’s kind of both?”
- “What makes this one different from these two?”
Week 2: Apply to New Areas
Your task: Use the Law of Opposites in areas beyond physical objects.
In behavior/character:
- Discuss brave and cautious (when is each appropriate?)
- Explore loud and quiet times (rhythms in the day)
- Compare fast work and careful work (when does each matter?)
In nature:
- Day and night cycles
- Seasons (summer and winter as opposites, spring and fall as mediators)
- Weather patterns (stormy and calm)
In stories:
- Characters with opposite traits
- Conflicts between opposing desires
- Resolutions that find the middle way
In art:
- Dark and light values
- Warm and cool colors
- Busy and simple compositions
Common Questions
“Isn’t this just teaching them to think in black and white, either/or?”
No—exactly the opposite. The whole point of the “connecting third” is to show that reality contains spectrums, not just extremes. But you can’t understand the spectrum without first understanding the poles that define it.
Think of it this way: You can’t understand “purple” without first knowing blue and red. You can’t understand “medium” without first knowing big and small.
“My child only wants to play with one type of object. They ignore the contrasts.”
Perfect. Follow that interest while adding variety within it. If they love spheres, provide spheres in different sizes, weights, materials, textures. The contrasts will emerge within their chosen focus.
“How long should they spend comparing before I introduce new concepts?”
As long as they’re engaged. Days, weeks, even months with the same contrasting objects isn’t too long if they’re still discovering. The foundation matters more than covering material quickly.
“Can I use this principle with older kids who’ve already been taught traditionally?”
Absolutely. Older children still learn through contrast—they’re just ready for more abstract opposites. Use it in:
- Literature (contrasting characters, themes, styles)
- History (opposing viewpoints, before/after comparisons)
- Science (control groups versus experimental groups)
- Math (different methods for solving the same problem)
Why This Matters Long-Term
When children learn through the Law of Opposites from early childhood, they develop:
1. Pattern Recognition The ability to see relationships, comparisons, and contrasts—which is fundamental to all higher thinking.
2. Flexible Thinking Understanding that most reality exists on spectrums rather than as absolutes—resisting false either/or thinking.
3. Synthesis Ability Finding “connecting thirds”—solutions that incorporate aspects of seeming opposites rather than choosing sides.
4. Clear Categorization The ability to distinguish, classify, and organize based on characteristics and contrasts.
5. Nuanced Judgment Recognizing that the same thing can appear different from different perspectives—the beginning of empathy and critical thinking.
These aren’t just academic skills. They’re life skills—the foundation for wisdom, not just knowledge.
The Math You’re Actually Teaching
When your three-year-old compares a sphere and cube, you’re teaching:
- Topology (the mathematical study of properties that remain constant through transformation)
- Geometry (three-dimensional forms and their properties)
- Set theory (classification based on characteristics)
- Logic (if this, then not that; if both, then mediating)
When your six-year-old arranges objects by size, you’re teaching:
- Seriation (ordering by property)
- Relative magnitude (bigger than, smaller than)
- Transitivity (if A>B and B>C, then A>C)
When your ten-year-old discusses why certain forms work for certain purposes, you’re teaching:
- Applied mathematics (form follows function)
- Engineering principles (structural properties of shapes)
- Design thinking (aesthetic and functional considerations)
You’re providing a mathematically describable framework for understanding life.
Not through worksheets. Through hands, materials, time, and contrast.
Starting Today
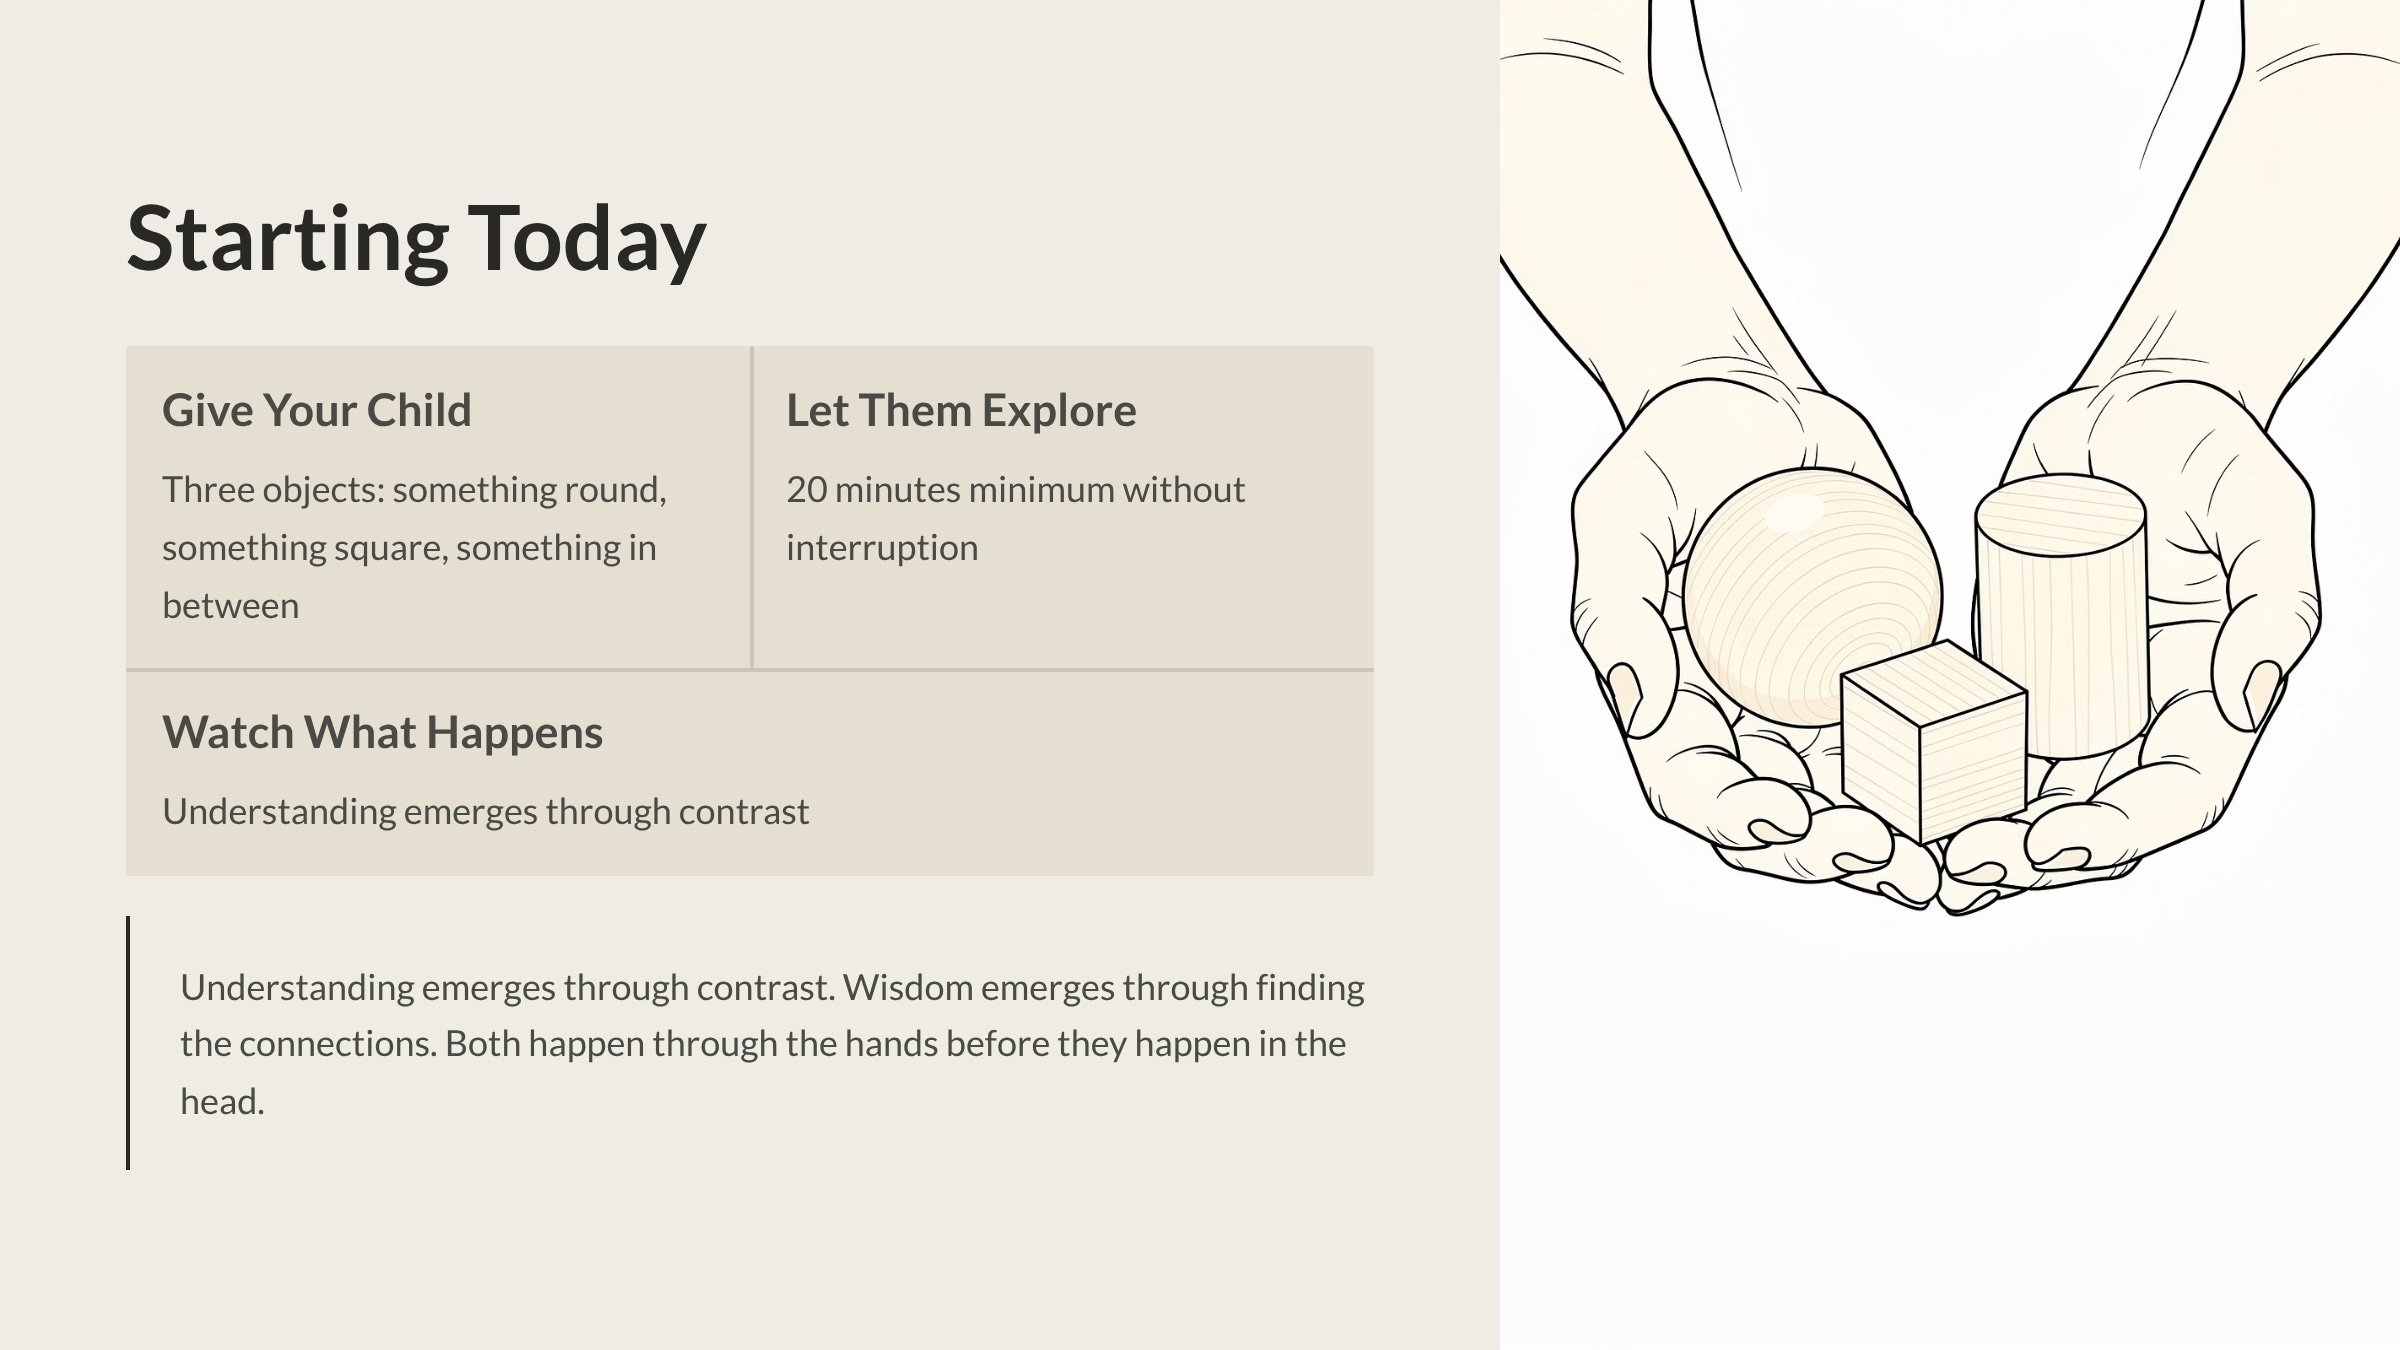
If you do nothing else this week, do this:
Give your child three objects: something round, something square, something in between.
Let them handle all three for at least 20 minutes without interruption.
Watch what they discover.
That’s the Law of Opposites in its purest form.
Everything else—the language, the extensions, the applications—builds naturally on that foundation of direct physical comparison.
Understanding emerges through contrast. Wisdom emerges through finding the connections. Both happen through the hands before they happen in the head.
That’s Froebel’s Law of Opposites.
Coming Next: We’ve explored how children learn through making the inner external, and how contrast helps them understand reality. Next, we’re tackling Froebel’s “Triad of Learning”—how to educate the Head, Heart, and Hand together for truly holistic development. What does it mean to engage all three simultaneously, and what does that look like in your daily homeschool rhythm?
Have you noticed your children learning through contrast and comparison? What opposites are they naturally exploring right now? Reply and share your observations—these real examples help all of us see the principle more clearly.
P.S. Froebel’s Second Gift (sphere, cylinder, cube) was specifically designed to teach through contrast, but the principle works with whatever you have: balls and boxes, round stones and wood chunks, oranges and books. Understanding the Law of Opposites matters infinitely more than owning specific materials. The principle is free; the materials are just tools for applying it.


LEAVE A COMMENT